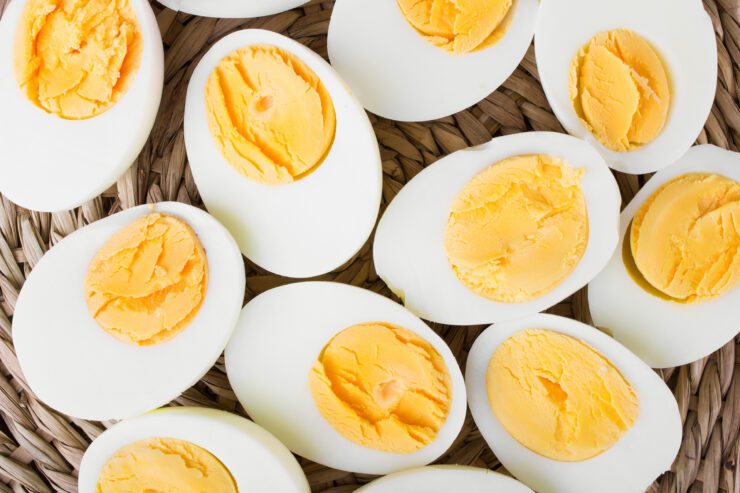
Here are the four steps to perfect hard boiled eggs.
Easter is this week! Which means eggs… everywhere! Dye them, hunt for them—but first, cook them right. Hard-boiling eggs can be a bit of a challenge. You want firm, velvety whites… creamy yolks, and that gloriously easy peel, every time.
So we brought in backup: Heather Smith of Orson Gygi helped troubleshoot every hard-boiled egg hiccup.
Prep Work: A Gentle Start is Key
Proper preparation begins before the eggs even hit the water. Heather emphasized the importance of careful handling. Use a strainer or a slotted spoon to gently lower your eggs into the water.
“We don’t want a hard rolling boil,” she advised, “because we don’t want them cracking and kind of rolling on the bottom of our pan.” Once the eggs are submerged, immediately reduce the heat to maintain a gentle simmer. This gentle cooking prevents the eggs from jostling too much and helps avoid tough, rubbery whites.
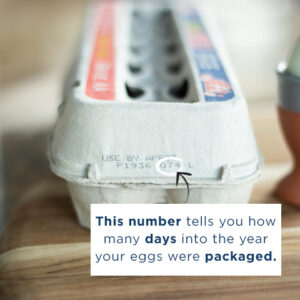
The Age Factor: Older is Better
Heather shared a little-known tip: older eggs are better for hard-boiling. If you have farm-fresh eggs, let them age for about 10 to 12 days. If you’re buying eggs from the grocery store, you’re generally good! They’ve typically aged enough by the time they reach your kitchen.
Cooking Methods
While various methods exist (Instapot, steaming, baking), Heather and the Orson Gygi team found that the classic approach of simmering eggs in water provides the most reliable results.
As for adding salt or vinegar to the water? Heather said it doesn’t make a significant difference in the peeling process. The key factor is the hot water itself, which helps the membrane just inside the shell release more easily later on.
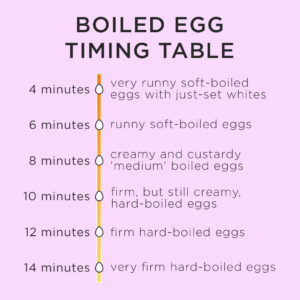
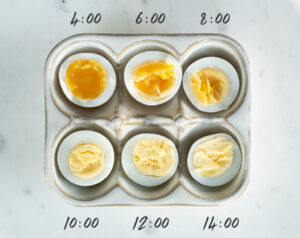
This is where you get to be the boss of your boil! The boil time depends on how you like your eggs. Follow the chart below to cook your eggs to perfection.
Cooling and Peeling
Prompt cooling is essential. As soon as the simmering time is complete, immediately transfer the eggs from the hot water to an ice bath. This halts the cooking process efficiently, preventing overcooking and minimizing the likelihood of that undesirable greenish-gray layer forming around the yolk. Heather finds a strainer useful for this transfer.
Once the eggs are cool, they should be ready to peel. Heather recommends starting at the wider end of the egg, which often contains a small air pocket. Gently crack the shell there, then carefully slide a finger or the edge of a spoon underneath the thin membrane that lies between the shell and the egg white. Once you get under this membrane, the shell should peel away more cleanly. If any pieces are particularly stubborn, peeling under cold running water can help dislodge them. “If it’s done correctly, these will just peel super easy,” she said.
Find more recipes from Heather and Orson Gygi on Instagram, @orsongygi, or on their website, gygi.com.


Add comment