
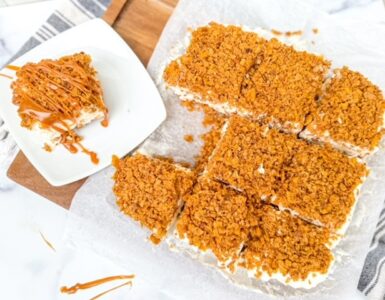
Want more cake per bite? Make cakesicles!
You know and love the cake pop… but now there’s an even sweeter twist on this bite-sized treat: the cakesicle!
Studio 5 Food Editor Maddy Tolman introduced us to this fun dessert, calling it ‘the cake pop’s cooler sister’—and we can see why.
Cakesicles are everything you love about a cake pop, but with a little more style and substance. They’re shaped like popsicles, making them easier to mold, coat, and decorate—and yes, you get more cake per bite. They’re great for prepping for a baby shower, a bridal brunch, or a sweet send-off for the school year.
One key tip before you get started: make sure to use a lay-flat silicone popsicle mold. This type of mold makes it easy to shape and remove the cakesicles without cracking the chocolate shell. There are great options available on Amazon.
Cakesicles
INGREDIENTS
- 1 baked cake (any flavor – boxed or homemade)
- 2–3 tablespoons frosting (buttercream or cream cheese)
- Candy melts or chocolate (for coating)
- Sprinkles or decorations (optional)
- Popsicle sticks
- Silicone lay-flat popsicle mold
STEP-BY-STEP INSTRUCTIONS
Step 1: Crumble the Cake
Once your cake is fully cooled, crumble it into a large bowl until you get a fine, sand-like texture.
Add frosting a spoonful at a time, mixing until the crumbs hold together like dough. The mixture should be moist but not wet.
Shortcut Tip: If you’re using warm cake straight from the oven, skip the frosting! Just crumble it in a bowl or stand mixer—the steam will help bind it naturally.
Step 2: Prepare the Mold
Option 1: The Chocolate-Shell Method
- Melt the candy melts or chocolate according to the package instructions.
- Spoon a layer of melted chocolate into each mold cavity.
- Use a brush or the back of a spoon to coat the sides evenly.
- Insert a popsicle stick through the mold’s slot.
- Chill in the fridge for 5–10 minutes until the shell sets.
Option 2: The Chocolate-Dip Method
- Press the cake mixture into the mold and shape it evenly.
- Freeze for 30–45 minutes until firm (but not rock hard).
- Melt your chocolate and pour it into a tall glass or cup deep enough to dip the full cakesicle.
- Remove cakesicles from the freezer, insert the sticks, and dip into the chocolate.
- Let the excess drip off and lay flat on parchment paper to set.
Pro Tip: For a flawless finish, dip twice!
Step 3: Fill with Cake Mixture (for Chocolate-Shell Method)
- Once your chocolate shell is set, press the cake mixture firmly into the mold, leaving a little space at the top for sealing.
- Make sure it’s compact so it sticks well to the chocolate.
Step 4: Seal with More Chocolate
- Spoon or pour more melted chocolate over the top of the cake-filled molds.
- Use a spatula to smooth out the back for a clean finish.
Step 5: Chill and Remove
- Refrigerate the filled and sealed molds for 10–15 minutes until fully set.
- Gently pop out each cakesicle from the mold.
Step 6: Decorate (Optional, but Fun!)
- Add a drizzle of contrasting chocolate.
- Top with sprinkles, edible glitter, or mini candies.
- Customize for your party theme or color palette!


Add comment