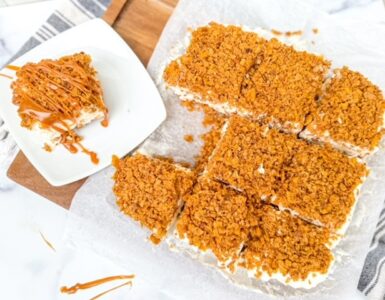
A batch of caramel tarts is perfect for any gathering!
Move over, pumpkin spice. Caramel is here to steal the show! Rich and gooey, it’s the perfect fall flavor. These caramel tarts are a creative way to use store-bought caramel for a homemade treat.
Heather Smith, from Orson Gygi, is our caramel connoisseur. She shared the ins and outs of working with caramel: thinning and thickening, heating and reheating, and using up your entire brick of Peter’s Caramel.
Heather said chilling your dough in this caramel tart recipe is absolutely essential. We know, it’s a step you really want to skip, but chilling your dough gives you a more flavorful cookie, a better texture, and a better shape.
You can bake these tarts up in mini tart pans for a personalized treat, or bake it in a larger tart pan for a bigger serving size.
Chocolate Caramel Tarts
INGREDIENTS
For the Cookie Layer
- 3/4 cups butter (softened)
- 1 cup granulated sugar
- 2 eggs
- 1/2 teaspoon vanilla extract
- 2 1/2 cups all purpose flour
- 1 teaspoon baking powder
- 1/2 teaspoon salt
For the Caramel
- 2 cups Peter’s Caramel
- 2 Tbsp Evaporated Milk
- For the Chocolate:
- 1 cup melting chocolate
METHOD
For the Cookie Layer
- In a large bowl cream together butter and sugar until smooth. Slowly beat in the eggs and vanilla. In a separate bowl stir together flour, baking powder, and salt. Combine the flour mixture with the other ingredients. Cover and chill dough for at least an hour, maximum overnight.
- Preheat oven to 400 degrees and scoop small balls of the dough into the bottom of mini-tart pans. Flatten the dough with your finger tips and make a smooth even surface at the base of each tin. Bake for 12 minutes, or until lightly golden.
For the Caramel Layer
- Allow your cookie to cool before adding your caramel. Melt down 2 cups of Peter’s Caramel and add 2 tablespoons of evaporated milk. Stir together and pour the caramel into each tin leaving enough room for the chocolate. Allow your caramel to cool before adding the chocolate. Place the tarts in the fridge if you want to speed up the process.
- Remember, adding evaporated milk keeps your caramel soft after it’s melted. If you prefer harder caramel feel free to leave out the evaporated milk.
For the Chocolate Layer
- Melt down your chocolate and drizzle over the caramel layer. You can fill it up to the top.
- Let the tart cool completely, either on the counter, or you can put them in the fridge to get them nice and cold before removing them from the tart pan. These will taste the best, and be the easiest to eat when they are at room temperature, so let them warm up a little before eating them.
Heather is offering all Studio 5 fans a discount on their caramel apple kit! Use code ‘STUDIO5’ to get $10 off your purchase.
Find more kitchen inspiration from Heather at gygi.com.
Heather Smith is the brand developer of Orson Gygi – the family-owned wholesale and kitchen supply store in Salt Lake City founded by Heather’s great-grandfather in 1945. Heather says Orson Gygi is her hobby. She’s committed to catering the store’s products to you and your needs as a home cook because she’s a home cook herself. She and her husband Matt have four darling kids.


Add comment