We challenged 5 talented women with the same challenge; to create
something fresh and unique with the oh so popular Martha Stewart craft
stencils.
Five creative bloggers share projects using Martha Stewart stencils.
Tristan Lloyd with ChiKKaBoom:
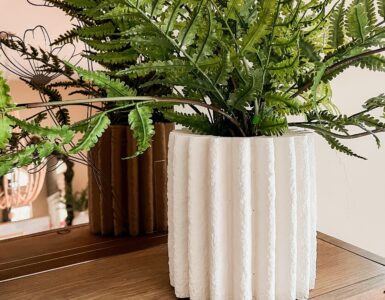
For this project, instead of paint, we used sheetrock mud, yes Sheetrock
mud!
This is SO super EASY, anyone can do it! What you need is:
• A frame ( any size will do )
• A background ( we used wood panels, but you could use
anything
from metal to scrapbook paper or wallpaper )
• Sheet rock mud and a small trowel ( you can find this at any
hardware
store )
• Painters tape
• Stencil
What we did is we took our frame and spray painted it a metallic gold, then
we measured the inside of the frame and cut the wood panels to fit!
Then you just place your stencil down where you would like and secure it in
place with painters tape!
Then just scoop up some mud and smooth it over your stencil being careful
not to press or work it in too much or it will bleed.
Then slowly pull your stencil off right after applying the mud…
And VOILA! It’s really that simple, and in the end you have a one of a kind
piece of art!
For more ideas, visit www.ChiKKaBoom.com
Tamarynn Bennett with sewdangcutecrafts.com:
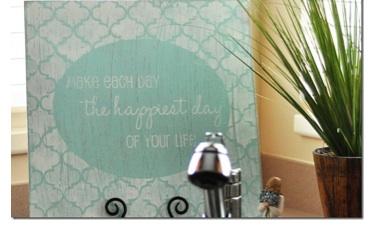
STEP 1: Start out with a piece of 15″ x 15″ MDF. Sand it down to get rid of
any splinters and rough spots. Paint your base color. I chose Spa Blue by
DecoArt.
STEP 2: I used my Silhouette to cut a vinyl stencil of an oval with the quote
“Make each day the happiest day of your life”. If you don’t have a cutting
machine, you can use an Exacto knife instead. You can use whatever color
of vinyl, because it’s going to get thrown away when we are done with it.
Place the vinyl stencil on your board.
STEP 3: Tape the Martha Stewart stencil to your board and begin painting
your top color. I chose white.
Line up the stencil to continue the pattern until the whole board is covered.
STEP 4: Remove the vinyl stencil, then sand the entire board to distress.
Check out Tam’s blog at www.sewdangcutecrafts.com
Becky James with The Crafting Chicks:
Stenciled Vintage Pyrex Dishes
When I received this challenge from Studio 5 to use a Martha Stewart stencil
set in a fun unique way I knew just what I wanted to do. I’ve fallen in love
with vintage Pyrex dishes. Have you seen these? Fun colors and some with
fun patterns and prints. In one of my recent thrift store runs I picked up a
couple dishes and just knew that these would be great for this challenge.
I wanted to make these dishes pop with color. I got some fun, bright paint
colors from the Martha Stewart paint line and carefully chose which stencils
I wanted to place on each dish. That was the hard part because the stencil
set I got had so many fun stencils.
First off, I cut my stencil out so it would fit inside my dishes and taped it
down.
I used the Martha Stewart sponge pouncers to apply the paint. Be careful
not to get too much paint because it will bleed underneath the stencil. The
best bet is to apply a few thing coats so that you can get a nice pattern.
If you want to layer colors then just wait for the first paint color to dry and
then move the stencil and start again.
I just love the whimsy the stencil adds to the dishes.
Now just load these up with treats and you are all set. I can’t wait to take
these to some fun picnics this summer. You might have to make sure no
one takes your dish now.
Check out more creative ideas at www.thecraftchicks.com
Melissa Quigley with Hollyhocks & Bumblebees:
The main thing I wanted to do with this challenge was use something a
little different & unusual as the background to start with. So I decided to
stencil on 3 different things. An old vintage classroom picture I had, a
canvas covered in fun bright scrapbook paper that I made & also an old
painting that I didn’t really like but loved the frame.
I liked how the different colors underneath the stencil shown through. It
really gave the project some character & variety because it just wasn’t a
two- toned project.
I even used the stencil to cute out shapes from scrapbook paper to adhere
onto my new piece of art- I thought it gave it a more unique look.
Check out Melissa’s blog at hollyhocks-honeybees.blogspot.com
Susan Petersen with Freshly Picked:
• Stenciled Leather Coasters
Check out www.freshly-
picked.com for more of Susan’s creations.


Add comment