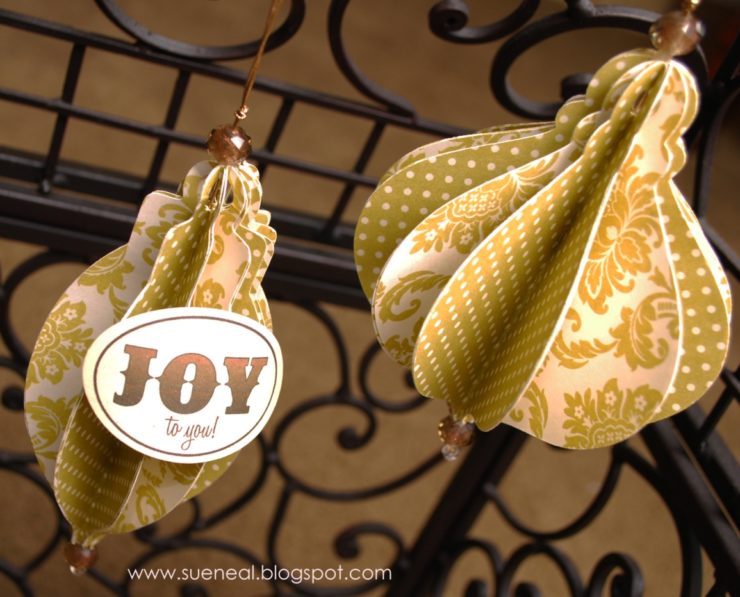
Scrapbooking paper is gorgeous but flat. Transform those beautiful patterns into 3-D ornaments with 4 simple steps.
Studio 5 Contributor Sue Neal shares instructions to make simple and sophisticated paper ornaments.
Make all of these ornaments with 4 simple steps.
1. Cut
2. Score
3. Fold
4. Adhere
Circle Ornament
{pretty like round ornaments that can be hung or just scattered for decor. Keep one top off to use as a place setting or a goodie bag/favor.}
Probably the simplest of the 3 ornaments to make because most of us have a circle punch. use between 1 1/2″ to 2″ circle punches.
You’ll need a total of 20 circles, but punch a few extras.
Create a triangle template to make the folding very easy (you can download it with my free templates).
Simple place triangle in center of circle and fold edges over. Repeat with all 20 circles. Adhere 10 of them together in a row, then adhere together to create a ring. Adhere five in a circle (cap) and repeat with the last 5 circle.
Adhere one cap to ring.
Before you adhere the other cap on, thread string through a small button and place inside cap, threading string through top hole. This will keep the string in place. Adhere cap to complete ball.
I like to cover up the intersections of each circle with decorative pins (look in sewing or wedding department of craft store) or brads work as well. Place a small micro glue top at base of each pin head before inserting into hole/intersection, this will keep it from falling out.
Options:
Leave a cap off to create a place setting. Cut a bamboo skewer down and insert into top hole. Print names on cardstock, trim and adhere to skewer with glue dots.
Create a goodie/favor bag by leaving a cap off and adhere a strip of cardstock to create a hanger. Use a brad to secure each end.
Hanging Ornament shapes
{The simplest score – in half! Lots of options here, as you could use any ornament shape as long as it’s symmetrical. You can use punches, free hand, find shapes on the internet or die-cut.}
DOWNLOAD FREE TEMPLATE HERE and trace on patterned paper. I used 11 shapes, but you could use less or more for a fuller look.
Score each shape in half lengthwise.
Start adhere each half to another half, alternating patterns. Before you close the final piece, thread string (I used elastic cording, found in beading department) with decorative beads and lay in center of ornament lengthwise. Now you are ready to close the final piece.
Thread another bead on top and knot cord.
You can keep the beads in place with strategically placed mini or micro glue dots. Use the tip of a pin to place glue dots, don’t use your fingers (it’s impossible!).
Barnyard 3-D Stars
{Lots of fun options with these shapes once they are done. Hang as an ornament, fill a wreath or use as a present topper.}
Cut out free template with scissors, die-cut or punch star shapes.
Score from one valley to opposite point. Repeat with all five points/valleys. Fold, crease well and shape into 3-D shape.
You can strengthen shape by placing 1/2″ foam squares (do not peel off top backing) in each point. The sides of the foam squares will help to hold it’s shape.
To decorate you can thread some thin wire through a button and through center of star (just poke through). Twist to secure. You can also glue dot gems in center.
To make wreath make your wire lengths longer and use them to secure to wreath.
To make double sided ornament, use micro glue dots at very tips of each point and attach to other side.
Find more information about Sue’s projects and papercrafting classes at sueneal.blogspot.com.


Add comment