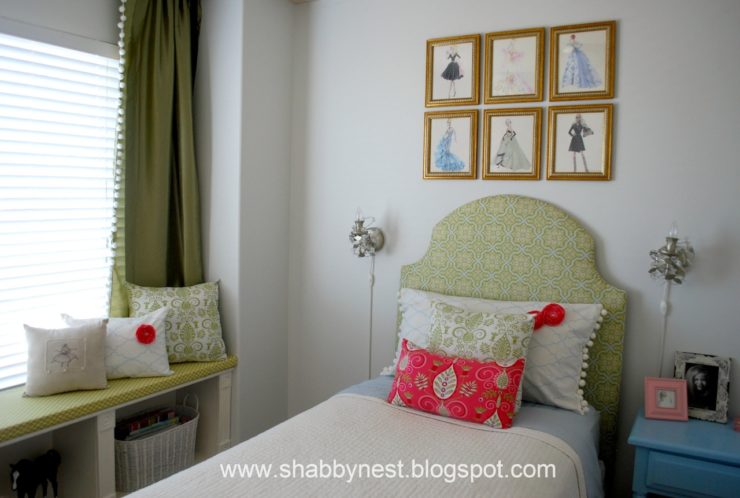
Create a bedroom that feels comfy and looks current. Update any bedroom
with an upholstered headboard that fits your style and your budget.
Upholstered headboards are kind of the “it” piece of furniture for a bedroom
right now. But since the look of an upholstered headboard can really range
from classic to contemporary, they are a perfect way to stay on top of the
decorating trends without compromising your personal style. And because
upholstered headboards are a really easy item to DIY, the price tag doesn’t
have to be an issue.
Step-by-Step Upholstered Headboard:
The process of making a basic upholstered headboard is really simple. Of
course, I’m not going to deal with tufting or some of the other things that
can complicate the process…although those can definitely be tackled as a
DIY as well. The process I’m going to share can really be done by just about
anyone.
1. Take measurements of the bed you’re creating the headboard for. Now
beds are a standard width, but can vary in height depending on the type of
mattress and the bed frame it sits on. So when you’re measuring, take into
account not only how wide you want to make the headboard, but also how
tall you want it to be.
2. Next, get some plywood and cut it to size. (If you have the tools, you
can cut it yourself, or you can have it cut to size at the hardware store).
3. If you want to have a special shape to the headboard you can then take
a piece of kraft paper and draw out a template. I simply draw half the shape,
work with it until it looks good to me, and then fold the paper in half and cut
it so that both sides are symmetrical.
4. Then place the pattern on your wood and trace it.
5. Using a jigsaw, cut out the shape you have traced.
6. You will want to lightly sand the edge to remove any splintered wood,
but remember that it will be covered, so you don’t need to sand it to a
perfect finish.
7. Now you will take your quilt batting and wrap it around the front of the
headboard attaching it to the back using a staple gun. I make hospital
corners at the edges, and for curved sections, I notch the back to remove a
bit of the bulk. NOTE: To create added softness, simply use additional
layers of batting.
8. After the batting is secured to the wood, you will follow the same
procedure with your fabric. Fabric should be pulled tightly, but make sure
you pull it evenly as well – especially if you are using a geometrically
patterned fabric – you want to make sure that your pattern is centered on the
front of the headboard. Again, fold the corners in “hospital” fashion and
notch any curves to create a smooth effect.
9. Cover the back with a sheet of fabric attached with a staple gun. You
can finish it by gluing on ribbon or seam binding for a smooth effect if
desired.
10. Attach your headboard to the bed frame or the wall.
Wendy Hyde is an interior decorator and DIY/Home Décor Blogger at The
Shabby Nest www.shabbynest.blogspot.co
m She loves to share ideas for
making home a beautiful place to be without breaking the bank!


Add comment