
Shelley Smith blogs at “House of Smith.” She shares this original project with Studio 5.
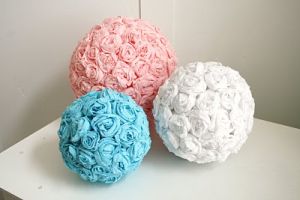
I was browsing blogs recently and found a post on the blog “Homespun with Heart,” about these great handmade crepe paper roses. The second I saw them I KNEW what I was gonna do! I have had these Styrofoam ball forms for a while now, and thought I would do cute flowers all over them, and hang them in the twins’ room. But sadly, the flower idea was pretty expensive (especially because I wanted to do three of them!) So I thought this was a great, thrifty alternative…and I love how they turned out!
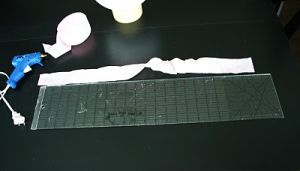
Here’s what you’ll need:
MATERIALS:
• Styrofoam ball forms
• Crepe paper streamers in whatever colors you choose
• Lots of hot glue sticks and a glue gun
• A roll of tape
• A measuring stick
INSTRUCTIONS:
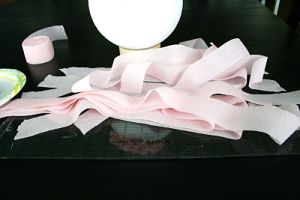
I measured my crepe paper strips at 24 inches, and ripped a BUNCH at that length, so I wouldn’t have to keep stopping, to rip more
Once that was done… and my glue gun was nice and hot, I started in on my flower makin’!
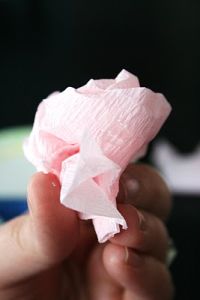
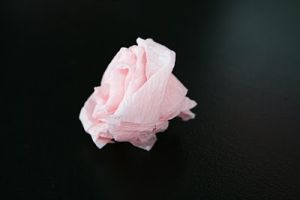
First I crumpled the strips up, to make them softer and more fabric looking.
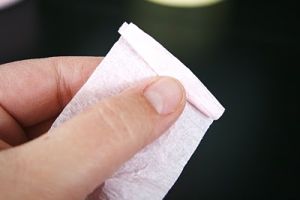
Then I straightened them out and began to roll.
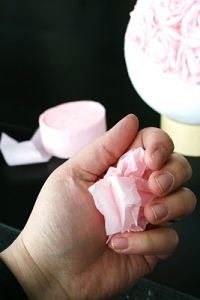
Start small….and then get a little looser. Like a real rose.
About 4 or 5 turns in, I would put a dot of glue on the end, by my thumb, to keep this part from unraveling. I did this periodically through each flower at a couple turns, to make sure that the flower didn’t just fall apart, once I was done.
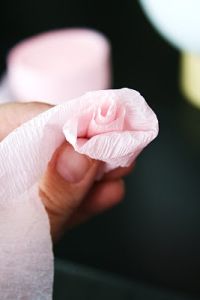
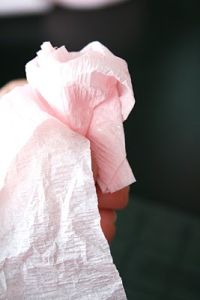
I would wind the paper around the middle base roll, and twist at the same time. So it looked MORE like a rose and LESS like a cinnamon roll. It is so easy (but a little time consuming!). Be patient with the first few flowers. It takes a couple to get it down. But once you do… you’ll fly through them!
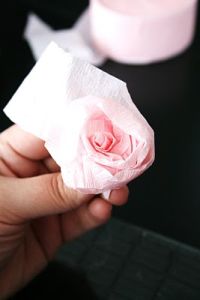
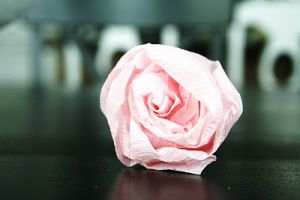
Here’s the end of the flower. I gathered the end piece of crepe paper and then add a dab of glue to the outside of the flower, itself, and stick it on the edge.
Set it down… and let the glue do it’s magic!
So fun, right!?
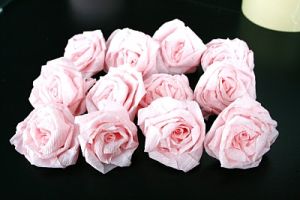
Seriously, you CAN’T mess these up! I had some flowers that I was like “That looks awful!” and some that I LOVED and thought looked like the real thing! And now that the whole thing is together… you can’t tell one from the other!
After I had a few flowers done, I would start putting them on the ball.
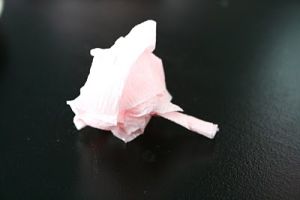
I noticed that there were some with longer stems than others, which made them a little more difficult to sit flat and nice on the ball form. So to avoid this I just ripped off the bottom!
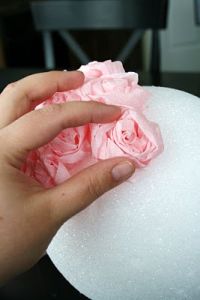
A little puddle of hot glue on the ball, lightly press the flower on… and you’re good to go!
I used a roll of tape to help keep my ball from rolling around on the table. It was a LIFE SAVER!
Make sure not to put the flowers TOO close together. Or they’ll start to look crowded.
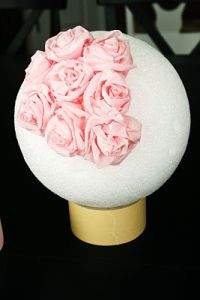
This is how it will look about a quarter of the way finished!
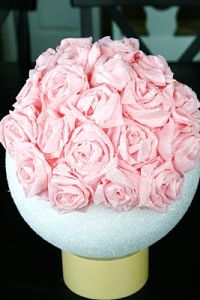
So fun! CHEAP and Easy!
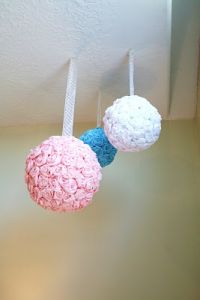
After they were all done, I had my husband, Cason, help me hang them up.I used some sheer, wired polka dot white ribbon (from Michaels craft store), and just some sewing push pins to adhere the ribbon to the ball. Cason took two small nails, with heads and nailed them in the ceiling. Wa-la! One corner of the room down!
Tips:
• You’re fingers WILL get burned. Work carefully.
• The Styrofoam balls are strangely expensive? What’s up with that? I waited for coupons each week to buy all three. I also used a coupon to buy the ribbon.
• I found the pink and white crepe paper at Walmart for cheap!
• The more “baby” blue color was harder to come by. I found it at Zurchers or Party City. They have LOTS of colors.
• Keep in mind the amount of crepe paper on the rolls you buy. There is NOTHING more annoying than running out of supplies in the middle of a project… I KNOW. It happened with the white AND the blue! Crepe paper is cheap! buy more than you’ll THINK you need.
• I used two whole rolls of pink, one and a half rolls of white and 2 rolls of blue (only because it came with less in each package at Zurchers!).

House of Smith’s is a fun new blog my husband, Cason and I started in order to track the cosmetic part of our families progress on our home remodel and design style, shift!
As a full time stay at home Mom of three beautiful girls and running a small business from home, I have found a new appreciation for the beauty and upkeep of my house!
And as each day goes by, and a new project gets done the phrase “Love the Space You’re In” becomes more and more meaningful to me!
I often try to find new fun ways to update, change, and decorate our “space” on a budget.
There’s something to be said about finishing a great project in your home, all on your own, looking back, and saying to each other… “WE did that !!!”
House of Smiths is a fun way for me to share, inspire, and learn from our new attempts at tackling projects on our very long list of “things to do!”
At the Smith house, our motto is… “Making a house, our HOME… one space at a time”
~Shelley Smith


Add comment