Lion House Pie Dough
Yield: 2 – 3 Shells
1 ½ cups Pastry Flour
1 ½ cups Bread Flour
( Or 3 cups all – Purpose Flour)
1 Tbs. Sugar
1 tsp. Salt
½ tsp. Baking Powder
1 Tbs. Nonfat Dry Milk Powdered
¼ cup Butter
¼ cup Margarine
1/3 cup Lard
1/3 cup shortening
½ cup Cold Water
(May need up to 1 Tbs. more water)
Measure all dry ingredients in a medium bowl and stir well with a spoon. Measure all fats and place on top of the dry ingredients. Cut fats into the dry ingredients with a pastry blender, table knives or rub it together with your hands until it is the size of small peas. Add the ½ c. water all at one time and mix together with a fork or mix lightly with your hands.
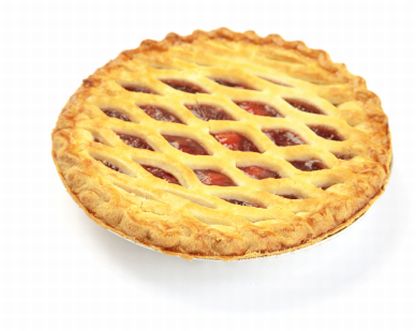
Divide dough into 2 or 3 portions (depending on how thick you want your crust). Roll out 1st portion of dough and line your pie tin with it. Roll out the 2nd portion of dough. Fold in half and cut steam slits into the fold.
Fill pie crust with filling. Brush the dough on the edge of the pie tin with water. Place the folded top crust onto the fruit filling and unfold it, making sure it goes to the edge of the pie. Seal the 2 crusts together. Brush the top with half and half and sprinkle with sugar and bake.
Most fruit pies can be baked at 375 – degrees for 45 – 55 minutes.
Light & Fruity PieLight & Fruity Pie
1 package (4 serving size) Strawberry flavor gelatin
2/3 cup boiling water
2 cups ice cubes
1 container (8 ounces) frozen non-dairy whipped topping, thawed
1 cup sliced fresh strawberries
1 baked pie shell (or graham cracker crust)
In a small bowl dissolve gelatin in boiling water. Add ice. Stir for 2 or 3 minutes or until gelatin thickens. Remove and discard the unmelted ice. Whisk in whipped topping. Fold in strawberries. Refrigerate, if necessary, until mixture mounds when spoon. Spoon into crust. Refrigerate at least two hours or until set. Garnish as desired. Store in the refrigerator.
Alternate method: Whisk in whipped topping. Spoon ½ the filling in the pie crust. Gently spread sliced strawberries on top and finish spooning the rest of the pie filling on top of the strawberries. Optional: fold one cup of sliced fruit into the filling and make two layers of filling with another cup of fruit.
Flavor Changes
Orange and Mandarin Oranges
Strawberry Banana and sliced bananas and strawberries
Lime with canned pineapple tidbits (do not use fresh pineapple with gelatin)
Peach with slices of fresh or canned peaches
Raspberry with fresh raspberries
PIE MAKING TIPS
1. Brush the edges of your pie with water just before putting the top on. This will help seal them together.
2. For a beautiful golden top – brush it with cream before baking using half and half, evaporated milk or regular milk. Sprinkle generously with sugar.
3. Make 4 – 8 pies at a time. Bake and then freeze, placing them in gallon zip lock bags. Once they are frozen they can be stacked on top of each other.
4. Frozen pies can be used anytime. When you have company, it is especially fun to put an uncovered frozen pie in a 350 – degree oven for 35 – 40 minutes. You’ll have a nice warm pie and no mess in the kitchen.
5. Keep pie shells from shrinking by always pricking holes in it first and then do one of the following:
a. Bake them on the bottom of an upside down pie tin.
b. After lining the pie tin with dough, line it with tin foil and then pour beans, wheat or rice about half way. Bake AT 375-DEGREES FOR 10-12 MINUTES then lift out the foil and continue the baking until light golden brown. Remember it will continue to cook after it is removed from the oven.
6. Bake fruit pies at 375 degrees for 35 – 45 minutes; rather than the 425-degrees for 5 minutes and 350-degrees for 35 – 40 minutes. This prevents the crust from getting so dark on top.
7. Bake pumpkin pies at 375 degrees for the entire baking time. Baking time could be somewhat longer at this temperature. This will help eliminate the dark spots on the top.
a. Check for doneness of pumpkin pies with a room temperature table knife. If you are checking more than one pie, use a different knife for each one. The knife should slide in easily and come out clean. If the filling sticks to the knife, leave it in for 2 more minutes and check it again. It finishes baking faster than you think.
b. Pumpkin pies can be made and baked, then frozen like the fruit pies.
c. Over baking pumpkin pies will cause the filling to shrink away from the side of the pie shell.
d. Pumpkin pies should be covered and refrigerated. Some shrinkage is due to the moisture evaporating from the filling.
e. Soggy pumpkin pie crust happens most often because of improper storage. They should be covered and refrigerated.
8. The key to nice looking and great tasting pies is practice! Practice! Practice!
9. HAVE FUN PRACTICING!!!
For more food storage recipes visit, www.everydayfoodstorage.net


Add comment