Put your craft stash away and instead, hit the home improvement store to
spruce up your home décor using paint sticks!
Blogger Kami Watson with Sweet Charli, shares ways to stir up your own
projects using paint sticks.
Who knew that there would be so many projects you could make using
stirring sticks from your paint store?? Not only are they easy to work with,
but they are also free! Freshen up your house for Spring with a few of
these easy projects:
First, here are a few tips:
**Believe it or not, not all paint sticks are the same! Some are
smooth,
some are rough. Some are longer than others. Some are flimsy…
If you want to find the best ones, look in a local paint store. Lowe’s and
Home Depot’s paint sticks are rough and unfinished, plus they aren’t as
long as others. I have found the best ones are Benjamin Moore brand paint
sticks. They are pretty long and smooth. Because the are sanded, they
paint up really nicely.
**Cutting paint sticks is easy. You don’t have to use a saw!! Just
take a
razor or serrated knife and score all sides of the stick in the spot you want
cut. Next, just break the stick where you’ve scored and it should break of
clean. You may want to sand where you broke it to get rid of the rough
edge.
Projects:
Ombre picture frame- Go buy a frame from the dollar store and
use 8-10
paint sticks (depending on the size of frame you are using, directions here
are for an 8X10, using a 5X7 photo). Cut the paint sticks to the width of
the frame by scoring them with a razor then breaking them. You may need
to sand the edges a bit. Next, buy acrylic paints in the color of paint you
want in the darkest shade and also buy white paint. Paint one stick with
your colored paint, and for each stick you paint after that, just add white to
it to get them the desired shade you want. Glue the sticks on your frame
from lightest to darkest.
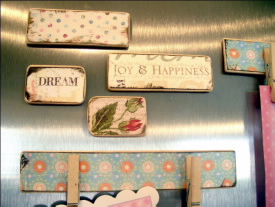
Refrigerator magnets- Use your scrap pieces of wood and any
scraps of
patterned paper you have lying around your house. Cut the paper(s) into
strips to fit onto your sticks. Ink the edges if desired. Next, modpodge
your paper onto your wood and modpodge over the top of your paper.
Wait for it to dry, then lightly sand the edges to give it a worn look. Hot
glue magnets to the back. These magnets would make a cute little gift for
a girlfriend or house-warming gift.
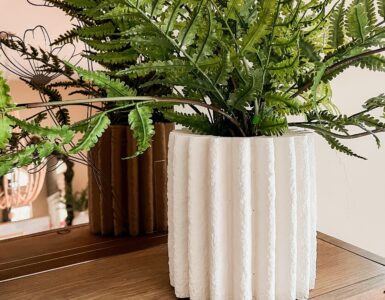
Vase- Use an oatmeal can, baby formula can, or any other can
depending
on size of your vase. Measure how many sticks you would need to
vertically cover the vase around. Paint your sticks to desired color, then
use a strong glue to adhere them on all around. You can drill holes in the
bottom of your can in the case of planting real flowers.
Sunburst Mirror- Find a round mirror from a thrift store or
around your
house. You will need about 40 sticks depending on the circumference of
your mirror. On half of your sticks you will cut off just below the curve in
the stick, thus making about 20 of your sticks 3-4 inches shorter than the
rest. Paint your sticks to the desired color. With a strong glue, glue the
sticks around the mirror so it looks like a sun. You will layer the shorter
sticks on top of the longer ones to get a staggered look.
Framed faux bead board- Buy a frame at the dollar store and
paint it to
desired color. Measure how many sticks you will need to fill your frame
horizontally or vertically, and cut the sticks so they will fit. Paint your
sticks to the desired color. You can stencil something cute on your sticks
or a put vinyl saying on it. Place the sticks inside the frame and put the
back of the frame on it, and you’re done!
Furniture- Dress up old furniture with paint sticks! This is so
easy to do.
You can place them on the top of a table to make it look like bead board or
place them on the face of drawers. Whatever you choose to do, make sure
you use a strong glue!
Puzzle- You can easily make a fun puzzle for the kiddos using
paint sticks
and a photo. Print out an 8X10 picture, or use a picture your child colors
and cut it into strips to match the width of your paint sticks. Glue or
modpodge each strip on your paint sticks. Each paint stick will contain a
portion of your picture that the child must put in order. For younger
children, write numbers on the bottom of the sticks in order so it will help
them know where to place them. No cutting involved! No painting
necessary!
Breakfast tray- Visit the thrift store or use a breakfast tray you
already
have. If you wish to paint it, do so. Measure how many paint sticks it
would take to fill the bottom of your tray lying them down next to each
other. Cut the paint sticks to fit in the tray, and paint the desired color.
When dry, use a strong glue and glue the sticks to the tray. You can stencil
a design on the sticks or use a decal to add a little glam!
Candle holders- Go to the dollar store and purchase a few of
their glass
candle holders. Cut your paint sticks to the height of the glass, paint them
to your desired color, then clue them to the glass using a strong, heat-safe
glue. Once the sticks are all glued on, tie a cute ribbon or jute around
them with a bow.
There are so many other things that you can do with paint sticks. Once you
get your creative mind thinking, you will probably come up with a lot of
your own paint stick projects!


Add comment