This is the last table setting formula you’ll ever need!
If you are hosting Easter brunch or just a Sunday dinner with the family this spring, don’t set a boring table. It doesn’t take much to put together a picture-perfect setting if you follow a five-step fail-proof formula… no overthinking, no stress necessary.
Designer Sarah Grover shared how easy layers, fresh colors, playful textures, and little details make a big impact.
Step 1: Start with a Colorful Base
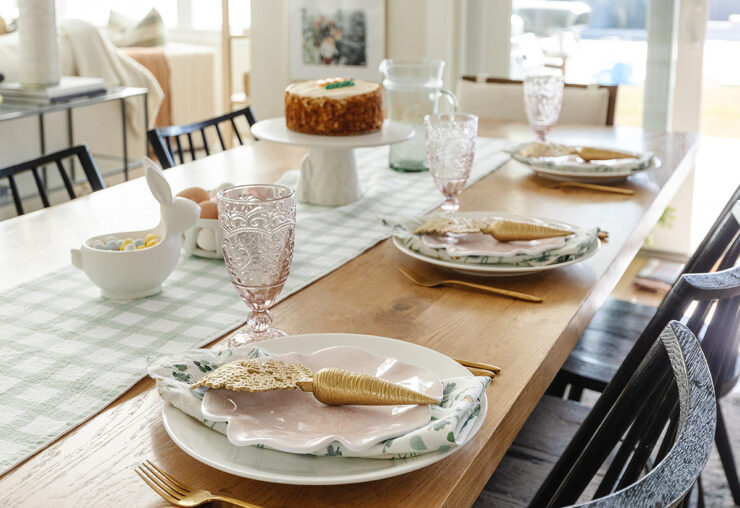
The first step to creating a stunning table setting is to start with a colorful base. Sarah suggested using a tablecloth or table runner that is bright and cheerful. “Patterns are a plus,” she said, as they add a gorgeous layer to everything you’re going to be placing on top.
You can mix and match patterns as long as the colors coordinate. “ As long as those colors coordinate, we want to mix and match,” Sarah explained.
Step 2: Layer with Place Mats
Adding a second layer with place mats is the next step. This is where you can mix and match textures, patterns, and colors. “I love this jute place mat. It adds that texture we’re talking about,” Sarah mentioned.
The key is to create depth and interest on your table by layering different elements. “ That’s really what creates an interesting moment on your table is the layers, the depth, the colors,” Sarah emphasized.
Step 3: Use Pretty Napkins
Napkins are an essential part of any table setting. Sarah recommended using cloth napkins, which are even more special when you add decorative elements. She suggested placing faux fresh tulips inside the napkins and tying them with a ribbon. “Very simple, very fresh,” she said.
Sarah also showed some cute, jute bunny napkin rings, and how to fold a cloth napkin into a subtle bunny shape. “ Just something fun and different with your napkins,” she said.
You can always make paper napkins look nice too. “Let’s say cloth napkins aren’t your forte. Or maybe you don’t have any,” Sarah said. “You can use paper and make them pretty.”
See the video above for the full bunny napkin folding how-to.
Step 4: Add Low Centerpieces
Centerpieces are a must, but they shouldn’t obstruct the view across the table. “ We want to add centerpieces, but we want them nice and low and practical,” Sarah recommended.
She likes using low centerpieces with florals. “ Florals is a must with your centerpiece, it’s gonna add color variation,” Sarah emphasized. “Tulips just speak Easter, don’t they?” she noted. Faux tulips are a great option since they last as long as you need them to and look real.
Once you have the centerpiece, Sarah recommended supplementing with bud vases. “ You definitely want to have color and texture in your variety of flowers, your variety of vases,” she emphasized.
Step 5: Display Spring Plates and Serveware
Sarah encouraged using spring-themed plates, serving bowls, and glasses. These items are often forgotten in the cupboard, but they can add a lot of charm to your table. “Get in your cupboard, pull things out, display them,” she advised.
“ I had this bunny bowl full of candy on my counter… dump out that candy and add in the bread,” Sarah noted. “Take a cute scallop dish and put your butter on it. Use those pieces that you have that maybe you’ve been displaying in a cabinet or just in your entryway even, and put it on your table. Use it. It’s practical.”
Find more inspiration from Sarah on Instagram @sarahgroverhome, or her website at sarahgroverhome.com.


Add comment