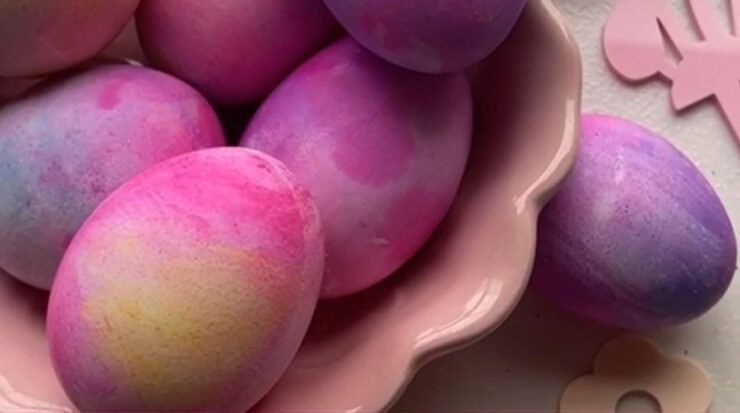
These tie-dye Easter eggs are pretty, AND exciting to make!
We are decorating Easter eggs with a science experiment. And, it’s even more fun when the science creates art. A chemical reaction makes magic happen, and the result is a perfectly marbled Easter egg!
Kelly Oester shared this method that will have your kids giddy with wonder as they see the result right before their eyes!
Tie-Dye Easter Eggs
SUPPLIES
- Muffin tin for eggs
- Muffin tin for paint (or small cups or bowls)
- Paint brushes
- Measuring spoon
- Measuring cup, dropper, or small cups for drizzling vinegar
- Hard boiled eggs
- Baking soda
- Water
- Vinegar
- Food coloring (gel makes for more vibrant eggs)
INSTRUCTIONS
- Hard boil eggs.
- To make your “egg paint”, mix 1 tbsp baking soda, 1 tsp water at a time until desired consistency, and food coloring (don’t be afraid to go heavy on the drops, the more drops, the brighter your results!!)
- Mix until it forms a paste. The thicker the consistency, the better.
- Place hard boiled eggs in a muffin tin and paint them. Try not to overlap too many colors or you could end up with brown eggs.
- Once eggs are completely covered in baking soda paint, drizzle with vinegar. Use medicine cups, a dropper, or measuring cups to pour on vinegar.
- When the vinegar hits the baking soda a fizzy reaction occurs which creates a colorful marbled effect on the eggs!
- Once the reaction stops, rinse eggs with water and then dry with a paper towel.
Find more projects from Kelly on her Instagram, @kelly.oester.


Add comment