
Studio 5 Contributor Susan Neal takes us inside her own card swap group and explains the why’s and how’s of starting a group of your own!
I moved to Utah in 1996. I knew exactly one person, my sister-in-law. It was a difficult transition made only harder by loneliness and my daughter’s illness shortly after we arrived.
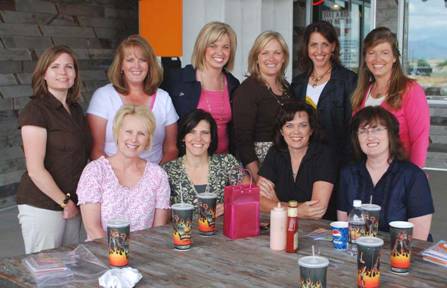
Almost one year later, one of my neighbors, Sharon Budge, invited me to join a card swapping group. At that point I had stamped some stationary, but really had never made a card. I knew, however, that this was a good opportunity to get involved, get creative and meet some new people.
It’s been 12 years and we’re still going strong. It’s been a wonderful opportunity to form bonds of friendship that I know will last forever. Not to mention discovering a great hobby that I’m still so passionate about.
Making 12 cards every month has taught me some great ways to create simple, but effective cards in no time at all. This has been particularly helpful as I’ve made invitations and announcements for weddings, birthdays, graduations, eagle court of honors, etc… I have saved money and made each one very personal and customized.
How do I start?
Hosting a card group means simply organizing it. Invite some people (it doesn’t have to be 12) who you think would enjoy making cards. Decide where and how you want to meet each month. We choose to meet at in restaurants, but many people take turns meeting in homes. Some people even choose to take turns making dinner, dessert or teaching card making techniques. Here are some quick tips for getting started.
• Decide when will we meet
• Decide where will we meet
• Determine how many will participate
• Invite and instruct
• Send reminders
Tips for Duplicating Cards
Whether for a swap or invitations, here are some tips and tricks
for duplicating easy, quick and less expensive cards.
Tips for making multiple cards
• Design a quick & easy card
• Make sure you have enough supplies for all the cards
• Cut and/or create all the pieces at once
• Form an assembly line and adhere
Here are a few more tips & tricks for saving money while duplicating cards.
• Reduce the standard sized card from 8 ½” x 4 ¼” to 8 ½” x 4″. This way you’ll get 6 cards from one sheet of 12″ x 12″ patterned paper. (see diagram below)
• Look for the number 12 in product (or how many are have in your group).
• Look for bulk items in product.
• Don’t forget to look in the wedding, floral, beading and needlework sections of craft stores for inexpensive embellishments.
• Use your computer, stamps, die-cuts, punches etc… for inexpensive embellishments.
• When shopping for product, always purchase 2-3 sheets of the pattern paper you love and then purchase 4-6 sheets of coordinating cardstock. That way you’ll always ready to create your cards without having to make return trips to the store.
• Look for Double-sided patterned paper for more design options
• Purchase neutral (white, natural etc…) cardstock (for your card base) in reams of 250. I recommend XpedeX.
• Purchase envelopes in bulk to save money
• Get together with friends or group members and share the cost for bulk purchasing.
12″ x 12″ sheet card ideas
Knowing the magic measurements will help you get the most out of your paper, have fewer scraps and save you money and time.
Those measurements are taken from a combination of the size of envelope you use and also the size of paper you purchase. I use a combination of both sizes of paper.
Most common sizes of paper:
• 12″ x 12″: Found mostly in scrapbook stores in a variety of colors and textures.
• 8 ½” x 11″: Found in scrapbook, office supplies and stationary stores. Standard sized sheet of cardstock. I purchase these in reams of neutral colors for the base of my cards, as well as for pieces I’m stamping or printing on. Bonus here is the size fits your computer printer.
Most common sizes of envelopes are
• A2 Envelopes (4 3/8″ x 5 ¾”): If you use 8 ½” x 11″ cardstock, then this is the perfect sized envelope to use, as ½ of a sheet folded in half will fit perfectly.
• A7 Envelopes (4 ¾” x 6 ½”): A little harder to find, but this envelope will fit a 6″ x 4″ card perfectly, in which case you would need to cut the 1″ from the bottom of the sheet.
• #10 or Legal sized envelope (4 ¼” x 9″): We all have these around the house to pay bills, but it also makes a fun sized card, but probably isn’t the most ecomonical. You would need to cut a sheet of cardstock down to 8 ½” x 7 ½” and fold in half to get a 8 ½” x 3 ¾” sized card. It is a fun canvas to design with though.
• Square envelopes: Look for these where wedding stationary is found (Xpedex) . I love a square card (they are so cute!), but again, not the most economical to make.
As I mentioned before, if you take your standard size card (4 ¼” x 5 ½” – fits a A2 envelope) by a quarter inch, you can then get six pieces of patterned paper instead of four. Here’s how and as well as 3 card ideas.
3 card bases from one 12″ x 12″ sheet of CARDSTOCK
6 pieces from one 12″ x 12″ sheet of PATTERNED PAPER to cover card base
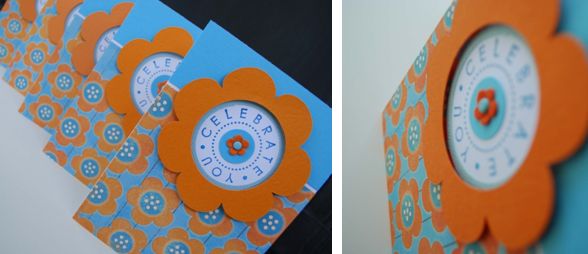
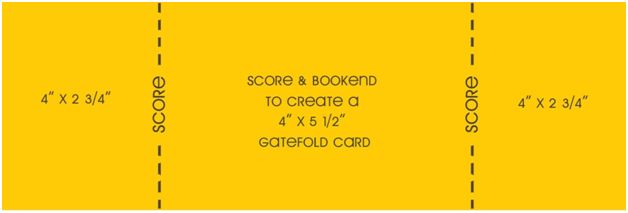
Gate-Fold card
Simply score and fold so end meet in the middle.
Matchbook card

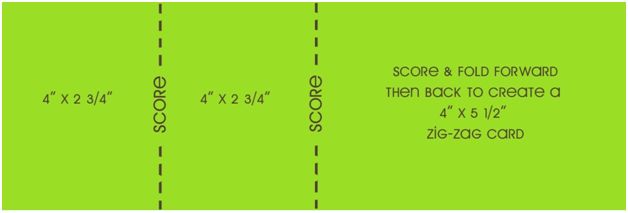
Zig-Zag card
To see cards made with these (and more) templates,
please visit my blog
www.sueneal.blogspot.com
in the coming weeks.
Enjoy!
Susan Neal has a passion for paper and food. Both present an opportunity to be creative and make other people happy. She has spent the last 20 years sharing that passion with students and customers alike.
Susan was born and raised in Montreal, Quebec. She has lived in Utah for 13 years and is now a U.S. citizen. She has been married to Steve for the last 27 years and is the mother of 5 children and one daughter-in-law.
She has authored 4 decorative painting books and designed hundreds of projects for several scrapbooking and paper crafting magazines and publications. She has also started several successful retail businesses.
Besides her free-lance design work, Susan is currently a PC Pro for PaperCrafts Magazine, serves on their editorial board and teaches throughout the country at Creative Keepsakes conventions. After years of creating jobs for herself in the craft industry, she has found her niche in paper; “the perfect, inexpensive, creative medium.”
After two years on Studio 5 representing PaperCrafts magazine, Susan is a regular paper crafting and cooking contributor.
Susan is also teaching her own series of card-making classes at eight of the local Roberts Arts & Crafts stores. To learn more about Susan please visit her blog, www.sueneal.blogspot.com.


Add comment