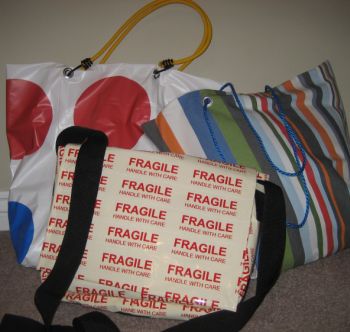
Using only tape, scissors and staples, Studio 5 Contributor Jennifer Heslop, turns unexpected items into purses and totes. My favorite: A Twister mat beach bag.
Inspired by the idea found in Simply Sublime Bags (Jodi Kahn, Random House Inc., July 2008) I put my own “twist” on this playful tote.
Supplies:
• Vinyl Twister mat
• Masking tape
• White duct tape (2″ width- this is standard size)
• Stapler and staples
• 1 inch grommets
• Handle for finished bag (nylon cord, rope, bungee cord, etc).
1. Use a hair dryer to smooth out the Twister mat. The mat does not need to be completely smooth- but try to smooth out the larger wrinkles.
2. Fold the mat in half length-wise so all four colored dots are visible. You should see three rows of all colored dots.
3. Fold the mat in half again- this time width wise. All the red and blue dots are now on one side and the green and yellow on the other.
4. Position the mat with the red and blue dots face-forward and the red dots running horizontally across the top. Hold the mat up and make sure the dots line up with each other. You will be able to see through the mat. Use a piece of tape to temporarily hold the mat together.
5. Keeping the fold at the bottom and centering the dots, cut the mat so that it measures 24 ½” x 26″. Trim the top and both sides- but DO NOT cut off the fold. You will end up with two pieces of folded mat with wrong sides together- an outside piece and a “lining.” Part of the side dots will be trimmed off.
6. Keeping both pieces together (with wrong sides together), open up the fabric. Fold over the top edges (red dots) 4 ½”. Use small pieces of tape to temporarily hold the folded edges in place. Repeat on the other end, near the green circles.
7. With right sides together, fold the rectangle, lining up the sides. Staple each side of the bag using a ½” seam allowance. Make sure the staples are very close together; touching if possible. Try to staple in a straight, clean line. Once you have stapled both sides, cover the staples with white duct tape (folded lengthwise over the raw edge).
8. With the bag still inside out create the bottom of the bag. Flatten one corner to create a triangular point, aligning the side seam with the bottom of the bag. Draw an 8 ½” line 4 ½” from the point. Staple along the line. Repeat on other side.
9. Trim off the points and cover with duct tape.
10. Turn the bag right side out.
11. Attaching the handles: Mark the position for two grommets on each side of the bag- approx. 8″ from each side and 2″ from the top. Following directions on grommet package- attach grommets. Hook two 12″ long bungee cord through grommets to form handles. Squeeze bungee hooks closed to prevent hooks from slipping out.
Studio 5 Contributor Jennifer Heslop loves turning trash into treasure. She is handy with a hammer, and has a knack for saving a dime by doing it yourself!
If you have questions for Jenn, e-mail her at Studio5@ksl.com


Add comment