
But there are some homemade gifts that are not only a good way to save a little money, but also a way to get your kids involved in the solution to frustrating question, “So, what are you going to give for Christmas this year?”
Studio 5 Contributor Kiersten Blanchard found some gift ideas that your friends, teachers and grandparents will actually want!
For TEACHER
Marvelous Mod Podge Clipboard
Needed:
Clipboard (available at Family Dollar for $1.50)
2-3 pieces 12×12 cardstock
Mod Podge
Ribbon
Letter stickers (optional)
Scissors
Pencil
Directions
1. First cut out all of the cardstock pieces. Trace the outline of the clipboard onto cardstock. Cut just inside the line, so that your paper will be barely smaller than the clipboard. The large piece should line up just under the clip, making the paper just under 11 ½ inches tall. Cut a strip 1 inch tall from the corresponding cardstock. Trace and trim it to fit on both sides of the clip. (I cut it so a little bit could go under the clip piece.) The back will also use two different cardstocks. Trace one to the width of the clipboard and about 10 ½ inches tall. Remember to cut barely inside the lines when cutting it out. The top cardstock piece will overlap, and should be the width of the clipboard and about 2 ½ inches tall.
2. Apply Mod Podge to the clipboard and stick cardstock in the correct place. Press into place, and let sit overnight to dry. There may be a little bubbling of the paper. This will dry flat if you leave it alone.
3. Apply any letter stickers you want.
4. Apply Mod Podge over the top of the paper. This will cause a lot of bubbling. Again, don’t worry. As it dries, it will again lie flat on the clipboard. (Trust me! I thought I had ruined mine, but it turned out great!)
5. Cut ribbon into short lengths and tie around the clip.
Thank You Card Bundle
Create a bundle of cards for your teacher. Just remember to fill one in with a heart-felt thank you for all your teacher does for you!
Needed for Snowman:
Card stock in desired colors (I used navy, lt. blue, white and orange)
White buttons in three graduating sizes
Glue dots
Adhesive
Pencil with eraser
White Acrylic paint
Directions
1. Create card by folding cardstock in half lengthwise and cutting in half. This will give you two standard 4 ¼” x 5 ½” cards. Trim another piece (light blue) to 4″ x 5 ¼”. Trim a white piece to 3 ¾” wide and cut a wavy line (to create snow surface) at about 2″ tall.
2. Adhere the light blue piece to the card and the white piece on top of that. Using glue dots, stick your buttons to the card with the largest on the bottom. Cut a small triangle out of orange cardstock for the nose and stick it on the top button.
3. Dip an eraser in white paint and dot it on the light blue cardstock to create “snow.”
4. Optional: write a message (Thanks “snow” much) on the front or inside of the card. If you used a dark cardstock for the card, remember to cut out a lighter 4″ x 5 ¼” piece inside for writing on.
Needed for Flowers:
Card stock and pattern paper in desired colors
Buttons (a variety of bright colors)
Flower buttons
Glue dots
Adhesive
Green marker
Directions
1. Create card by folding cardstock in half lengthwise and cutting in half. This will give you two standard 4 ¼” x 5 ½” cards. Trim another piece to 4″ x 5 ¼”.
2. Adhere the smaller piece to the card. Using glue dots, stick your buttons to the card with one small button in the middle and 5 or 6 around it. Add a few flower buttons around the large flower.
3. Draw green stems on the flowers and write “Thanks a Bunch!” on the bottom.
For FRIEND
Homemade Lip Gloss
Needed:
Petroleum Jelly
Kool-Aid or Pixy Stix
Microwave-safe container
Small bowl for mixing
Small containers for holding the finished lipgloss (Classy Chassy’s Supply)
Microwave
Directions
1. Put a large spoonful of Petroleum Jelly in a microwave-safe container. Microwave for 45 seconds. Stir. Put the container back in the microwave for another 45 seconds. Continue doing this until the petroleum jelly melts. Be sure and take it out every 45 seconds to stir.
2. Stir in some powder from the Kool-Aid or Pixy Stix. The more you use, the darker your lip gloss will be. Stir until it all dissolves.
3. Spoon the mixture into the small clean containers. Set aside and let the lip gloss get firm before you use it. This will take a couple of hours.
Fleece Snow Hat
Needed:
Tape measurer
½ yard fleece fabric (a little more if you plan on making a pom-pom on top)
Scissors
Needle and thread
Buttons or felt pieces for decorating
Rubber band
1 yard decorative cord
Directions
1. First, determine the size of that had. Measure the head of someone who is similar in size to the recipient. Cut a piece of fleece that is 16″ wide and as long as the measurement you took plus 2 inches.
2. Fold the fleece in half, right sides together, so that the 16″ edges match up. Sew a ½” seam along the edge, stopping 5 inches from the bottom. Just below the last stitch, make a ½-inch cut from the side. Turn the material right-side out and sew a ½” seam along the last 5 inches of the fleece.
3. Roll the bottom of the hat up two turns, so the raw edge is concealed in the cuff. To keep the cuff from unrolling, sew on a decorative button, or felt cutout.
4. Gather the top 3-5 inches of the hat and wrap a rubber band around it. Tie a cord over the rubber band. (To make a pom-pom, before gathering the top, you cut 2 ½” slits every ¾” from the top of fleece.)
Marshmallow Shooter
Needed:
Plastic PVC pipe (1/2-inch diameter)
2-90 degree elbow pipe connectors
Mini marshmallows
Small cellophane bag
Pipe cutter
Directions
1. Cut the straight pipe into an 8-inch, and 2 4-inch lengths.
2. Attach the 2 elbows to one of the 4-inch pipes, pointing opposite directions. Attach the remaining two pipes to each of the elbows.
3. Put some marshmallows in a cellophane bag and give with the shooter.
For GRANDPARENTS
Cool Cocoa Creations
Needed:
Powdered cocoa mix (plain milk chocolate works best)
2 Orange slices
2 Cinnamon bears
5 Junior Mints
5 Raspberry Thin Mints (I used Necco)
6 Tree-shaped marshmallows
Clear cellophane bags
Card stock (to create labels)
Stapler
Directions
1. Put enough powder for one 8 oz. serving of hot cocoa into a cellophane bag.
2. In each bag put the candy for one of the flavors. This will create 5 different bags
3. Out of cardstock, create 5 different labels. To create the label, cut a piece of cardstock the same width as the bag, and 5 inches tall. Fold it in half, so it’s now the width of the bag and 2 ½” tall. Put a fun saying on each bag to indicate what flavor is inside. For example:
“Orange” you glad I love you.
From “hot” summer days to snowy winter
nights, I love seeing you all year!
We were “mint” to be best friends.
Wishing you a “berry” Merry Christmas
Being your grandson is a “tree”t!
4. Fold down the top of each bag and staple the label on top. Include a card with directions for mixing the cocoa!
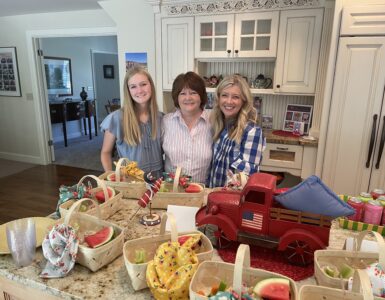
Let’s Get Together Picnic
The one thing grandparents can get enough of from teenage grandkids is TIME. This packaged picnic is a promise for one fun meal together and some serious bonding time!
Needed:
Basket
Non-perishable food items for a lunch
A calendar
Directions
Pack a small picnic for two. Include only the non-perishable food items. Use the calendar to schedule a lunch date with your grandparents. Remember any perishable food items on that day. Most of all…Enjoy!


Add comment