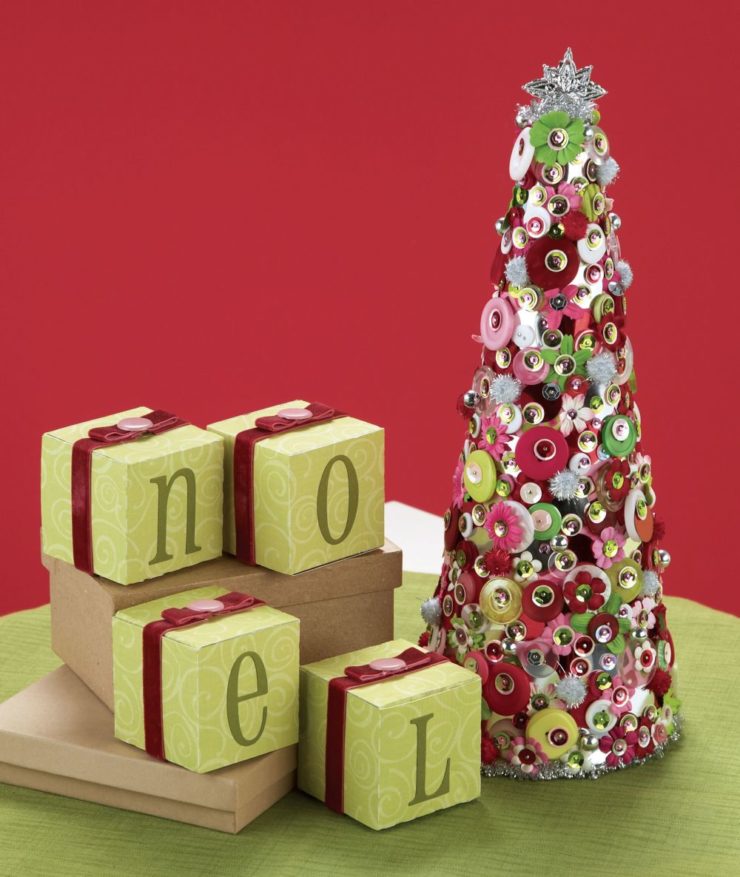
Susan Neal with Paper Crafts Magazine shares step-by-step instructions to help you create your own Bling & Button Tree.
SUPPLIES:
Patterned paper: (Christmas Groovy) KI Memories
Accents: (assorted flowers) Prima; (assorted buttons) Autumn Leaves, 7gypsies, Doodlebug Design; (assorted sequins) Offray; (silver tinsel, assorted pom-poms, silver star, silver bead stick pins) JoAnn Stores
Other: (foam cone, stick pins)
Finished size: 5″ x 13″DIRECTIONS:
1. Adhere patterned paper to cone.
2. Pin tinsel around top and bottom of cone.
3. Pin sequins, buttons, and flowers to cone.
4. Poke star into top of cone; adhere.
Designer Tips:
• To adhere the patterned paper to the cone, use an adhesive specifically designed for adhering to foam.
• Separate your embellishments into little bowls or containers to make it easier to see the items you’ll be placing on the tree.
Bonus Ideas:
• Try covering the tree with strips of ribbon instead of patterned paper.
• For a less sparkly tree, decorate with assorted buttons only and add interest by layering them.
• Adapt the tree for Mother’s day, fall, or any other holiday or season.
Designer: Dawne Ivey
For more projects from Paper Crafts magazine go to their web site at www.PaperCraftsMag.com.


Add comment