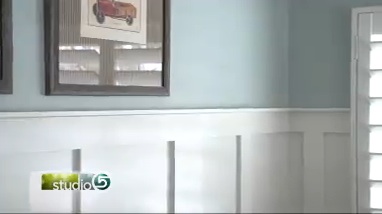
DIY house projects are always a thrill, but planning for it may be rather difficult. One of the most impressive projects is “board and batten” but it can look intimidating.
Fix-it Chick, Amber Anderson shares some tips for planning and installing the latest DIY project, board and batten.
There are four things you need to keep in mind before you get started with your board and batten
1: Base Board Thickness
The base board should be a little thicker than the vertical board.
2: Measurement and Placement
If you have a bigger room, you can make the vertical boards farther apart. For smaller rooms, the vertical boards need to be closer. That way you can still see the effect of the boards with whatever size room.
3: Cutting the Trim
Don’t cut the trim yourself. There are some products that are readily available so you can get the perfect trim look in your room.
4: Determining the Height
With traditional ceilings, the board should run two-thirds up the height of the wall. Older homes with higher ceilings can make the boards go up a little higher to give the room a more formal look.
Installation tips
Tip 1: Use a Suction Laser Level
This is Amber’s favorite tool. It allows you to place your board without drawing any lines.
Tip 2: Use a Nail Gun
If you can’t beg, borrow, or buy one, rent one from a home improvement store. A nail gun gets the job done faster and gives it a more professional look.
Tip 3: Have a good caulk tip.
A good caulking job is usually overlooked. But it is actually the tool that brings the board and batten all together for that professional, sleek look everyone dreams of.


Add comment