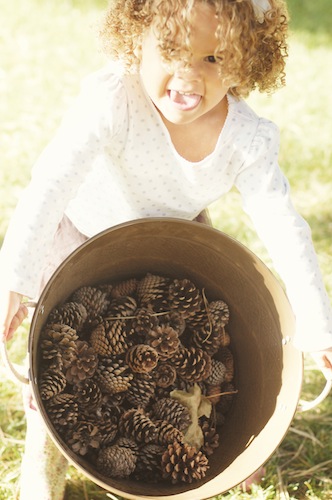
The holidays are the perfect time to decorate with pine cones, but you might
be stumped by what to do with them. Now the new look of pine cones can
be yours, so start gathering them up and get ready to decorate.
Blogger Amy Twitty shares some of her creative ideas for decorating with
pine cones.
Pine Cone Mini Tree –
When I first thought of this I thought it would be a fun centerpiece or even a
mini tree for a child maybe to place in their own room. To construct this, I
went up the canyon and “borrowed” some dead branches that were already
on the ground. I spray painted them white and placed them in a vase I
already had. Then I started adding the pine cones. I hot glued the ornament
hook on the top of the pine cone. Then I put some tape around the bottom
of the hook so when I spray painted it, it wouldn’t get the hook wet. I
purchased some accessories at Hobby Lobby and viola!!!
Pine Cone Garland –
I wanted to have something fun to hang in place of a fireplace. Something I
could add our stockings to and dress it up a bit. I took 18 gauge wire
purchased at Hobby Lobby for $4. I had extra mason jars and tulle I had and
wired them in a pattern. The trick to getting the wire around the jar is
wrapping it around and then twisting the jar around the wire to make it tight.
I added little lantern lights in the mason jars to give it some light.
Pine Cone Framed Tree –
Rummaging through my craft corner I found an old frame that I like and
didn’t use. So I took the picture out, painted the cardboard white. I placed
and hot glued the pine cones into the shape of a Christmas tree. I thought it
needed a little something something so I added some $1 ornaments from
Hobby Lobby.
Pine Cone Chandelier
Deciding that we needing something to spice up our kitchen, I wanted to
make a chandelier, or at least one I could afford and maybe transfer to my
daughter’s room after the holidays. I bought a 6″ Styrofoam ball from Hobby
Lobby for $5. Before beginning I knew there would be some spaces that I
couldn’t fill with the pine cones so I wrapped them with some scrap fabric I
had. Then I began hot gluing the pine cones one by one, turning the ball as
you go. The key is to allow a minute or two for them to dry before you turn
the ball. I placed them on vase while I did this so it was stable and wouldn’t
move around. We thought it looked like a hair at some point so we added a
face to the fabric before covering it. Sometimes you have to have a little fun
during these tedious projects. Before I finished I added some string and hot
glued about a 6 inch strip to make sure it was secure.
Pine Cone Snow Globe
Rather than your typical snow globe I decided to use a pine cone. I hot glued
the pine cone to the bottom of the mason jar, took an old paper plate and
traced it to the lid to give it some color. Then I purchased fake snow at
Walmart for $2 and added some to the globe. My daughter is in love with this
and I think it is something you definitely could have your kid participate with.
Ribbon Pine Cone.
Not your average pine cone. If you are not a fan of the actual pine cone but
you like the look, this is perfect for you. I purchased a Styrofoam Egg from
Joann’s for $4 and the smaller ones you can get two for $4. You will need
scissors, pins, and ribbon that is 7/8″ thick. You cut a piece of cross grain
ribbon about 1 3/4″ long. You use approximately 4 yard for the larger pine
cones, and a little less that 3 yards for the smaller ones. At the tip of the egg
you will pin a piece of ribbon since that piece won’t be able to be covered.
Then you start with 4 pieces of ribbon and start folding and pinning. Pinning
at the two ends. Then you continue onto the next row in between the 1st
row. For the next few rows you are starting a pattern filling in gap from the
previous row. You will start to see a strong pattern around lines 3-4. Then
you just work in a circular motion until you get to the bottom of the pine
cone. The key is to make your ribbon a sharp point then it really gives the
look of the pine cone.
For more information, visit Amy’s blog at http://caseyamyfamily.blogsp
ot.com/


Add comment