
Blogger Brooke Ulrich of “All Things Thrifty” shares step-by-step instructions on how to craft up your own DIY signage.
Step 1: Get a sheet of MDF and cut it to the size you need (I have the guys at Home Depot cut it for me most the time!).
Step 2: Find a design that you love and print it on a transparency.
Step 3: Paint the boards the color you desire.
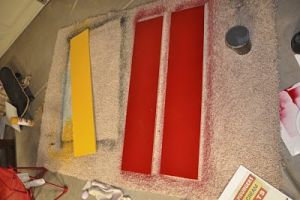
Step 4: Glaze the boards to create a more vintage look
Step 5: Use an overhead projector to project the design on the boards. Next, trace the design onto the boards. This helps to make your design perfect. Some can “freehand” the words or shape of their choice, but others cannot. Using a projector can help make the designs look professional.
Step 6: Once the design is traced onto the boards, use craft paint to paint on your design with a paint brush.

Step 7: After your design is painted onto your boards, let the paint dry completely. Then take a high grit stand paper and sand off some of the design. This adds character to the design and makes the sign look more vintage and old. This is the part that makes the boards look authentic in my opinion.

You can find designs all over the place for your signs. I have gotten design ideas from pillows, from catalogs, from wall paper…etc and by using a projector, you don’t have to stress about duplicating the design.
I’ve even used this concept to paint a design on my wall!
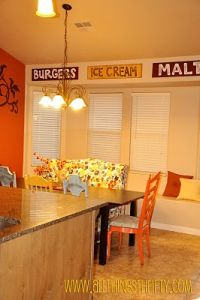
“All Things Thrifty” is a site to prove to you that decorating can be inexpensive. As she lets you know by the title of her blog, Brooke Ulrich loves “all things thrifty”. Spending her time as an adjunct professor and a mother of three, decorating can be time-consuming and expensive. For Brooke, though, taking the time to decorate is a passion and spending a ton of money to do so is unnecessary. Whether she’s repainting furniture to give it new life or reupholstering a seatee by herself, Brooke shows how you can DIY on a budget (she even shares the cost of her projects). Check out more of her projects by visiting: www.allthingsthrifty.com.


Add comment