
Megan Pyrah blogs at “Brassy Apple.” She shares the how-to for adorable embellished arm warmers.
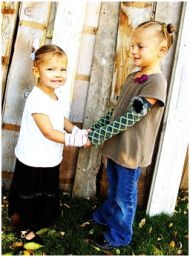
Take the chill off of the winter season without over roasting your kids in a bulky sweater or too many layers. Or if you kids are like mine they are cold one minute and “So HOT” the next they are running to change into a tank top! Here’s the solution – pair a t-shirt up with some inexpensive arm warmers! So easy to slip them on and off quickly. Take the Arm Warmers them to the next level by embellishing them for the Holidays or the everyday!
Supplies list:
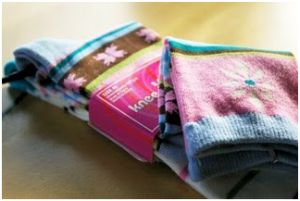
• A pair of long socks (or tube socks.) Pick out your favorite pattern/color, etc
• Sewing Machine (or needle and thread)
• Scissors
• Measuring Tape (optional)
• Embellishments (ribbon, buttons, rhinestones, tulle, etc.)
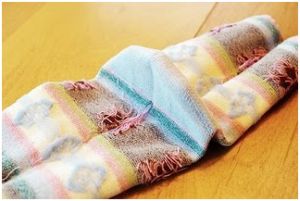
Step 1: Pick out your favorite pair of socks. They can be Holiday, solid colored, patterned etc. Make sure to buy the Knee Length or Tube Sock style.
Step 2: Measure the length you want your arm warmers to be. You can measure out how long you want them to extend up your child’s arm by placing the sock on their arm and eyeing it out. You want the sock to reach to or just past their first knuckles.
Or you can measure with a tape.
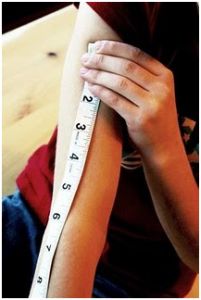
Step 3: Measure and cut off your socks to the desired length. Be sure to cut from the toe end. We want to keep the other finished end in tacked.
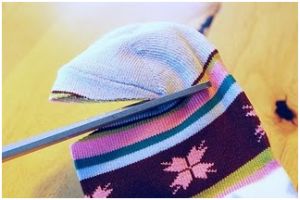
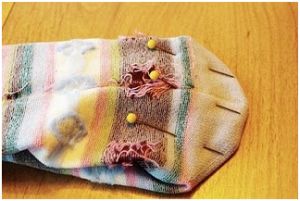
Step 4: Turn your socks inside out and find the “heel” spot. *(note: some socks are made without a built in heel. If yours do NOT have a rounded heel in them please proceed to step 7)*
Pull the heel up as shown in the picture making sure the other sock fabric is seperated. We will be sewing and cutting the heel out to create one long tube.
Step 5: Pin the heel area as close as you can to the “bottom” of it to create a straight “tube” when it is sewn together and cut off.
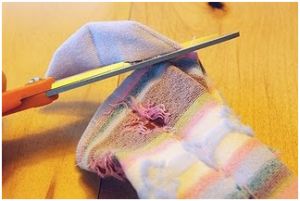
Step 6: Sew a straight line across the bottom of the heel to shut it and cut off the excess.
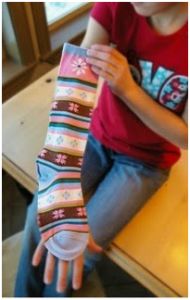
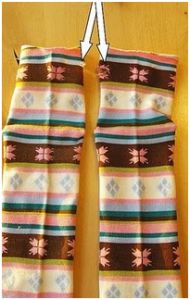
Step 7: Turn your socks right side out and lay them flat placing the “heel” seam on the underside. This will ensure that the seam isn’t on top of their arm when they wear the warmers. Cut a small slit for the thumb. **One slit on the right inside and one slit on the left inside. ** See pictures below

Cut your slits on opposite side of each other so the heel seams remain on the underside. Embellish as desired.
And you are DONE! Slip them on your cutie and enjoy! Toss in the wash when they get dirty, slip them off for meal times, etc. Have fun and get creative with yours!

Make the arm warmers long, mid length or sport some fingerless gloves or wrist cuffs! They are even great as baby leg warmers!


Megan, or “Ms. Apple” as the delivery guy sometimes calls her, is the creative force behind Brassy Apple. She is a sewing pattern designer and passionate ‘DIY-er.’ She loves to share her tutorials, photography and ideas on the Brassy Apple Blog! Check out more of her ideas at www.brassyapple.blogspot.com.


Add comment