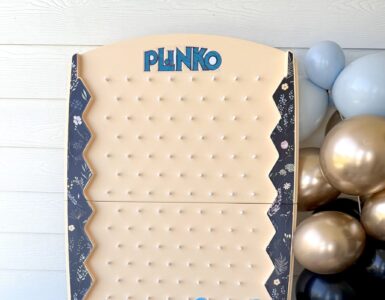
These party arches will serve you all year long.
You’ve got a year of parties ahead, and to set the tone each time, you’ll need a set of party arches. This is the portable party backdrop that can go with any theme. We’re pretty certain you would never spend the money to buy them if you knew how easy it was to make them.
Studio 5 Creative Contributor Kelly Lonnecker shares the simple tutorial.
Party Arches Backdrop Instructions
Supplies
- Foam Insulation Board (Home Depot $14 for 4×8 sheet)
- Cutting Tool (Extended Utility Knife)
- Long ruler or yard stick for creating sharp straight lines
- PVC pipe (elbow and two straight pieces to create an L shape) or other brace to support
- Fabric or other covering (paper tablecloth, wrapping paper, paint, etc)
- Decorations (as desired—balloons, banners, party fans, pom poms, lettering)
- Straight pins, tacks or tape for adhering decorations and background
Instructions
1. Trace the desired shape onto a foam board and cut using a utility cutter. Cut in several layers rather than 1 deep cut to get a cleaner finish.
2. Create your cover by either sewing fabric into a slipcover (trace foam board onto a stretchy fabric and sew two layers together leaving the bottom open so that it can slide over the top of the arch), or simply wrap fabric or paper around the front of the arch and tack it to the back using pins or tape.
3. Attach a brace if desired using tape or other medium.
4. Attach decorations using straight pins, tacks, or tape as desired.
Kelly Lonnecker has a passion for making all of life’s special moments memorable and beautiful. She loves to celebrate and believes that from invitations to thank you cards, an event can be both simple and stunning! As Studio 5’s Creative Contributor, Kelly strives to inspire viewers to create in ways that are both meaningful and manageable. Connect with Kelly by emailing her at studio5@ksl.com.


Add comment