
Contributor Jennifer Heslop created this Studio 5 do-it-yourself project that really dresses up your patio area.
Supplies:
2 identical lampshades
½ yard fabric
1 yard trim
spray adhesive
Poster board
Scissors
fabric glue or hot glue gun
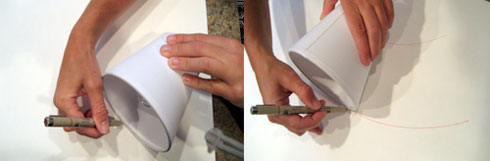
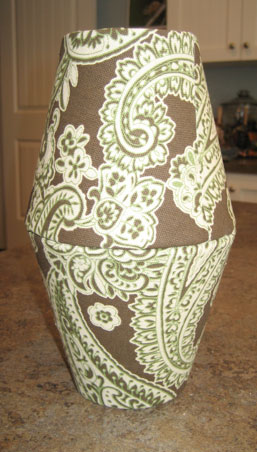
1. Begin by creating a pattern for the lampshade. Mark a spot on the lampshade as your starting point. Lay the shade on its side on the poster board and roll the shade as you trace along the bottom edge. Continue rolling the shade until you reach the original starting point. Back up and repeat the process, this time tracing the upper edge of the shade. (See illus.)
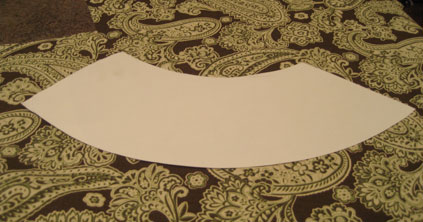
2. Cut out the pattern allowing an extra ½ inch all around the pattern (this will allow enough fabric to tuck around the edges of the lampshade). Lay the pattern on your fabric. Trace and cut out.
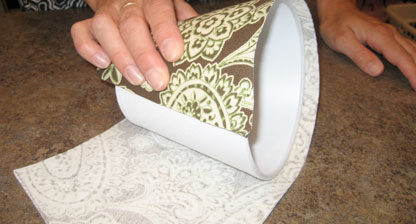
3. Spray lampshade with spray adhesive. Lay the shade on one end of the fabric and roll lampshade across the fabric, allowing the fabric to stick to the shade. Glue down edge using fabric glue.
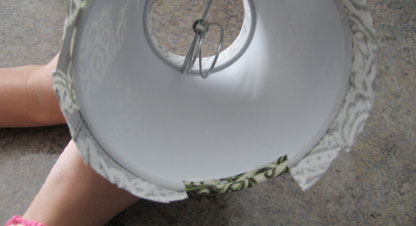
4. To finish the top and bottom of the shade, clip around shade about every inch or so creating tabs. Glue each tab down.
5. Cover both lamp shades, match up wide ends and hot glue the shades together.
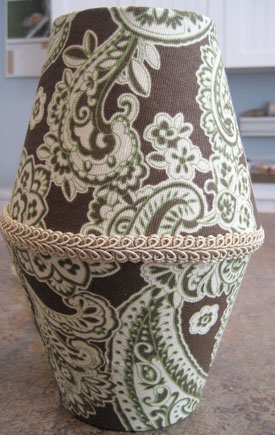
6. Finish off patio lamp by gluing trim around top, bottom and middle. Attach to patio or trees using ribbon or chain.
Studio 5 Contributor Jennifer Heslop loves turning trash into treasure. She is handy with a hammer, and has a knack for saving a dime by doing it yourself!
If you have questions for Jenn, e-mail her at studio5@ksl.com.


íoslódáil saor in aisce post insta