Paper Crafts Pro Susan Neal reveals a variety of ways you can incorporate these fun fibers into your projects.
_______________________________________________________
Cover chipboard. Wrap wide lace or other trim around chipboard shapes to create delicate accents that are also easy to make.
Create letters. Combine various types of trims to spell sentiments and titles. For best results, keep the letters large so the trims take center stage.
Fashion a decorative edge. Adhere rickrack, pom-poms, or other trims to create decorative edges that are fun to look at and to feel.
Cover a button. Add an extra layer of color and personality to buttons by covering them with bold-colored trims. Select trims that have a loose weave so some of the button still shows through.
Build a frame. Frame sentiments, photos, and accents with a mixture of assorted trims for an eclectic look that is totally chic.
Make tabs. Create quick and easy tabs by looping trims and adhering them to the edges of mini albums or cards. Fasten them with staples or brads for a finishing touch.
Create a binding. Bind mini books, cards, or tags with lace trim. Make sure you match the color of your trim to your patterned paper for a more uniform look.
Form a flourish. Adhere delicate trims to cardstock or chipboard to create one-of-a-kind flourishes. To ensure the longevity of the flourish make sure you use a heavy duty adhesive.
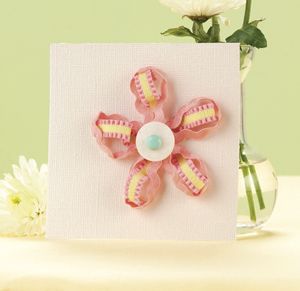
Make a flower. Loop and layer multiple trims to make a three-dimensional flower that is perfect for cards, gift bags, or tags.
Projects created by Melissa Phillips.
____________________________________________________________
For more projects from Paper Crafts magazine visit www.PaperCraftsMag.com.


Add comment