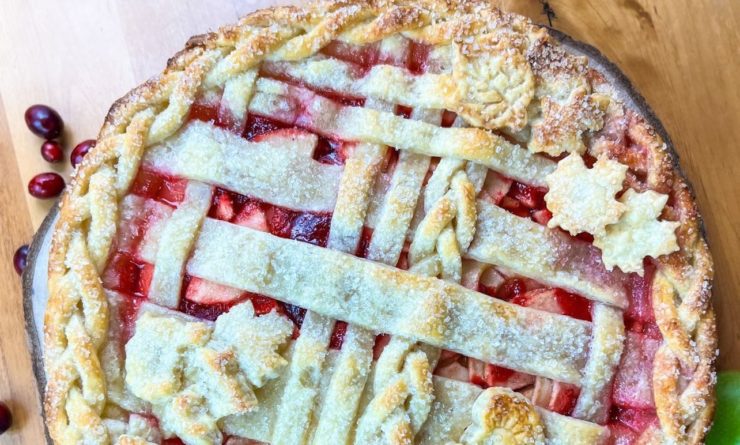
The perfect pie crust is within your reach!
Pie is a dessert we usually make once, maybe twice a year. If you’re going for the homemade crust and all, perfect your skills with a little refresher course. Once you have the basics, you’ll be able to make the perfect crust every time.
Khara Westergard steps out the process for making homemade pie crust. The first thing you need to do is actually consider your baking dish. That will determine how you make the crust. Khara goes through all the little details that will make your crust flakey and delicious.
Find more recipes and inspiration from Khara on Instagram, @balsamicbaker.
ALL-BUTTER FLAKEY PIE CRUST
By Balsamic Baker
Makes two standard 9” crusts.
Increase by half for a deep dish or extra large double crust pie.
Ingredients
- 1 C. Unsalted Butter, (2 sticks 8 oz./226.8g) each Tablespoon chopped into quarters & chilled well or frozen
- 2½ C. All-purpose Flour, (11.25 oz./319 g)
- 1 tsp. Table Salt (reduce to a scant 1/2 tsp. if using salted butter)
- 1 Tbsp. Sugar (optional)
- 1/4 – 1/2 C. Ice Water, (2-4 oz./56-113g.) more or less as necessary
Instructions
Prep your butter & get it chilling.
Pulse the flour, salt, and sugar in a food processor until mixed well.
Add the butter and pulse (count 1-one thousand) about 10 times, maybe a few more, until the butter is the size of large peas.
Add 1/4 C. of ice water, minus the ice, and pulse the dough briefly. Add 1 Tbsp of the remaining ice water at a time, pulsing briefly after each. Stop when the dough just comes together. Do not overwork! Dough should still look crumbly but hold together like dough when you pinch a handful of it together. If it can hold together but will still crumble like sand after being disturbed, it is still too dry. It should feel moist but not sticky. Use extra flour when rolling out if you feel you’ve gone too far. But do not work more into the dough (do not overwork).
Pour dough out onto work surface. Cut in half, & press dough into 2 semi-flattened disks. Wrap in plastic food wrap & chill at least 30 minutes in the fridge before rolling. This gives the gluten time to relax. The dough will be too tight to roll well at first. It also chills the butter again to make sure it doesn’t disappear into the dough too much. Visible chunks of butter are good! You can save the dough at this point for a few days or freeze for longer storage.
After rolling out dough on a floured surface, lightly fold dough or wrap over rolling pin for ease of transferring to your pie dish. Press dough into the pan & cut off excess around edges. If baking before filling, skip to blind baking instructions below.
2 crust filled pie: Brush the bottom of your pie crust with an egg white to give it a little protection from the moisture of your filling (hoping to avoid soggy bottoms). Save remainder of egg for egg wash at the end. Prep top crust into strips for lattice or cut shapes for steam holes. Fill, top, & style as desired.
Chill again one last time before baking (while oven warms), & brush with egg wash just before baking (1 egg mixed with 1 Tbsp. or more of water, milk, or cream. Or, go egg free with just cream/milk). Sprinkle with course sugar if desired.
Tent your pie edges to avoid burning. Wrap tin foil fully around sides, hovering up over & around the pie edges avoiding smashing your designs.
Bake on a sheet pan as directed for the pie filling recipe you’re using.
Blind baking: After prepping a 9 inch pie pan with your dough. Style the edges & chill crust again before baking (30 minutes in fridge, or 10 for freezer). Cover well with plastic wrap if storing longer before baking. Add a wash if desired (brush with options listed in 2 crust method). Put aluminum foil or parchment inside of the empty crust and fill with pie weights, dried beans, lentils, or dried rice. Bake on a sheet pan 10-15 minutes in a 425 Degree Fahrenheit oven, or until pie edges are beginning to brown. Then remove the pie weights and foil or parchment. Pierce the dough all over the bottom with a fork (docking your dough). Bake for 5-10 additional minutes until the bottom is cooked through. Remove from oven and let cool completely before filling.
Alternatives to food processor
Pastry cutter, or a fork in a pinch.
Hand mixing/cutting/pinching/squeezing.
Stand mixer with a paddle attachment.
Gluten-Free Adjustments – increase water until not crumbly after a squeeze test. Crust may need a little extra baking time.


Add comment