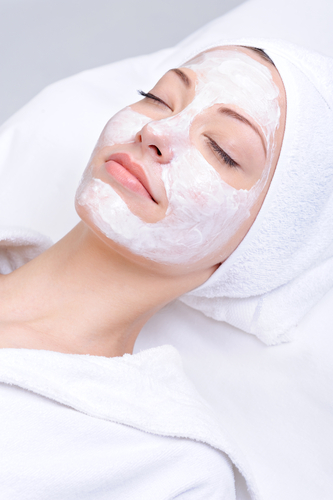
Home Facials not only pamper the skin, but are relaxing for the mind and body. Everyone should take some time out for themselves once in awhile.
Kari Romney of Cosmetic Enhancements shares ideas and recipes for creating a relaxing home facial.
With budgets being tight, it is not always affordable to go get a facial. The good news is that you can give yourself a professional facial right in the comfort of your own home. No appointments, no expensive spa, just pure pampering for yourself.
No matter how we try to avoid stress, it has a way of finding us. Stress not only takes a toll on your body, but your skin as well. You can see signs of stress on the skin. Stress can take away your skin’s healthy glow. Your skin can turn dull with an ashy cast making you look older and even sick. Anything that you are prone to, such as oily skin, acne, fine lines and wrinkles is only intensified by stress.
As stress shows on the outside of the skin, it is also taking a toll on the inside. There are chemical reactions to stress that affect the skin. Testosterone can be increased (even in women), causing the skin to produce more oil which makes oily skin worse, and acne breakouts more frequent. The hormone Cortisol increases with stress inhibiting collagen production adding to the skins aging process, and increasing fine lines and wrinkles.
We can’t always control what goes on in our lives, but we can control how we handle stress. Home facials are a great way to help manage stress while pampering yourself. Sometimes it is even fun to invite a close friend or two to join you. Sharing a few good laughs with friends during a home facial may be just what you need to rejuvenate yourself inside and out.
Home Facials are easy… follow these simple steps for a great experience.
Time Required: 30 – 45 minutes
Supplies:
• Headband to hold hair back out of face.
I like the Tassi headbands.They keep your hair out of the way without messing it up. For your own Tassi you can order online – www.tassicompany.com
• Facial Cleanser
• Facial Mask (optional: easy natural homemade recipes on www.kariromney.com click blog)
• Facial Exfoliator
• Facial Moisturizer
• Cucumber slices or tea bags for eyes
• Clean towels & washcloths
• If using aromatherapy oil make sure it is 100% pure, not synthetic
1. Preparation: Before starting I recommend you gather all your supplies, and have a few things prepared so you are not interrupted.
• Light candles (preferably aromatherapy candles). I like the one at Bath and Body Works called ‘Stress Relief’. It is a mix of eucalyptus which clears the mind, and spearmint which is uplifting.
• Turn on relaxing music.
• Clear a place to relax and lie down.
• 2 slices of cucumber or fresh steeped tea bags.
• Heat wet folded towels in microwave – store in a pan with lid.
• Make masks of choice (optional).
• Just before beginning facial, sprits the air with an aromatherapy spray (optional).
2. Cleanse: When cleansing the face, it is important to remove all makeup, dirt, and oil from the skin. Clean your face, neck and chest by using your basic facial cleanser and warm water. Use gentle circular upward motions with your wash cloth. If needed, use a makeup remover to remove all eye makeup. Rinse your face thoroughly.
3. Exfoliate: Exfoliation removes dead skin cells. It is the key to healthy smooth skin. Start by applying your facial exfoliation to your chest, then neck and face. Be sure to stay out of eye area. Follow the directions of your exfoliation product. When done, remove by gently rinsing off completely.
You can also make your own: ‘Sugar Exfoliator’… (do not use salt, too abrasive for skin)
2 tbsp sugar
3 tbsp warm water
Stir sugar in warm water till it is melted and granules are dissolved. Apply to skin gently messaging around using upward circular motions. Rinse with steamed wash cloth from microwave. Remember to check that it is not too hot.
4. Open Pores: This is a great part of the facial. There are several ways to do this…
A. Steam your face either by using a home facial steamer, or hot water in sink or bowl with a large towel placed over your head. Lean in close to the steam, but not too close to avoid burning the skin. Stay in this position for at least 5 minutes.
B. My favorite way is to apply hot damp towels to my face. You can do this easily at home. Lie down and apply your damp hot towel. Start by putting the middle of the towel on your chin and wrap the ends up and around your forehead. Spread out the sides of towel to cover the sides of your face. Leave a small opening for your nose to breathe. Caution before applying hot towel. Check temperature on wrist to make sure towel is not too hot to avoid burning. Relax for 5 minutes.
Give yourself an extra treat by adding a few drops of aromatherapy oil in your hot water or to your wet towels before heating.
5. Apply Mask: Select a face mask that is best for your skin type and conditions. All natural homemade recipes found on www.kariromney.com, click on blog. Follow the directions from mask of choice. Be sure to cover your face, neck and chest. Avoid eye area. Most masks require 10 – 15 minutes.
6. Your Eyes: Lie down and apply either cucumber slices or cool damp tea bags on your eyes. Breathe deep, take in the relaxing music and enjoy the moment. 🙂
7. Rinse: Discard cucumber slices or tea bags. Using a warm wet towel, gently wipe off mask. Start with the face, then neck and chest. Be sure to pay attention to the areas around your nose and hair line. Masks seem to get left behind in these areas. You may want to use a second towel to make sure the mask is completely removed.
8. Moisturize: Using your moisturizer, gently apply with fingers massaging cream in upward motion around the face, neck and chest. Avoid eye area, unless your moisturizer is made for the ocular area. If you use eye cream, apply your eye cream first before moisturizer. Gently apply around the eye area using your ring finger.
NATURAL HOMEMADE MASKS
Your kitchen is full of wonderful ingredients that make a ‘natural homemade mask’ easy and nourishing for the skin. These ingredients have been used for centuries in skincare.
Plain Yogurt: A popular natural beauty ingredient for the skin. Can be used alone or added to many facial recipes. Offers cleansing properties, as well as aids in healthy skin, and body. Yogurt contains natural lactic acid which soothes, softens and tightens the skin. It is ideal for all skin types including dry sensitive skin. When using yogurt for acne purchase “live” yogurt. Live yogurt enzymes help kill bacteria.
Honey: Honey is probably one of the most important and versatile ingredient in skin care. It is full of nutrients, antioxidants, healing and anti-aging properties. Before antibiotics ‘RAW HONEY’ was used topically as an antiseptic. Raw honey promotes new tissue growth. Contains bee pollen, propolis and other components that stimulate growth of new cells. It is ideal for all skin types and conditions.
Avocado: Although avocados have not been proven to be beneficial in anti-aging, it does have a number of ingredients that are truly beneficial for skin. Avocados are loaded with essential fatty acids which provides moisture to the skin. Vitamin A and E are powerful antioxidants aiding in protection from free radicals. Avocados are high in Sterolins which are reputable in being helpful in scar healing and sun damage. Creams containing avocados are not always 100% natural. It is best when seeking a natural avocado mask to make your own.
Cucumber: Cucumbers are known for their wealth in water, vitamin E and natural oils which make for one of the best remedies for external skin care. Cucumbers are an excellent source of ‘silica’, a trace mineral that aides to the strength of our connective tissue. They also contain ascorbic and caffeic acids. These acids help in preventing water retention. Cucumbers are a great topical application for tired puffy eyes, burns, and other skin conditions. With all their natural oils and water, they soften and hydrate the skin. Cucumbers contribute to improving and rejuvenating the skins texture, while reducing fine lines and wrinkles.
Oatmeal: Rolled natural oats (not instant) make a great skin treatment for all skin types, especially good for dry, sensitive skin. Oatmeal can be used to make a gentle and effective skin cleanser, facial scrub, and soothing facial mask. Oatmeal helps to relieve dryness, reduce discomfort, restore moisture balance, and aids in minor skin irritations. When cleansing with oatmeal, the oats absorbs and removes surface dirt, and impurities. It provides the skin with a gentle exfoliation, leaving smooth, soft, clean skin without the use of soap. As a mask or exfoliator, oatmeal will deep cleanse the pores, remove dead skin cells without drying or irritating the skin. Your skin will be left with a natural, healthy glow.
Lemons: Lemon juice squeezed from natural lemons is the best to use, otherwise it may be diluted. Lemons are loaded with vitamin C making it a natural powerful antioxidant. For those who are prone to dark spots lemon juice assist in slowing down hyperactive melanocytes which aids as a skin lightener. Lemon juice is known for its tyrosina inhibitor factors in preventing pigmentation. Some say lemon juice has helped in reducing pimples. Caution: Lemon juice is not for sensitive or dry skin. You can use lemon juice by adding other ingredients and using less of the juice. Proceed with caution as it can irritate the skin making conditions worse.
With questions or for more information call Kari at 801-558-4804 or go to www.kariromney.com


Add comment