
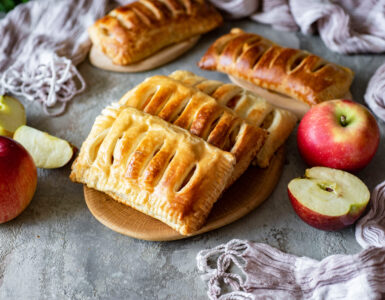
Your table runner can double as the dessert table!
Let’s be honest. Dessert is the main event, so make it the center of the tablescape! A cake table runner takes dessert to great lengths.
Betheny Tomseth shares how to make this over the top, and oversized, foodscape… a party piece that quite literally takes the cake.
A cake table runner is the perfect springtime gathering piece.
“It would be so cute for springtime bridal showers, baby showers, engagement parties, as well as birthdays,” Betheny said.
It’s composed of a few rectangular-cakes, welded together. A cake this size has to be made in pieces. Otherwise, you won’t be able to fit it in your oven or fridge. You’ll need to assemble it on-site.
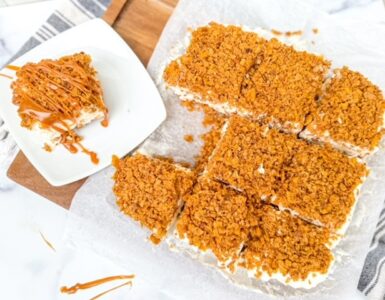
If you aren’t crazy enough to make an entire table runner cake, a rectangle cake is still a win!
Pro Tips for Making a Cake Table Runner
1. Use dummy cakes! Dummy cakes are a great way to reduce your time in the kitchen and eliminate food waste. Determine how many servings you will need and only bake what is necessary. For instance, I used three 6″ cake dummy squares and I only baked one 6″ cake, allowing me to use only one batch of cake batter instead of four.
2. Use simple decorations! A piping bag is honestly not even necessary for this style. Grab an angled spatula or even a spoon to frost this cake. In fact, a more rustic style is preferred as it makes hiding the seems much easier. Flowers (dried or fresh), fruit, or even store-bought pastries from your favorite local bakery make the perfect toppings for this cake.
3. Know your Measurements! Make sure you know the size of the table that you will be serving the cake on beforehand. From there, determine the width and length of your cake, taking into account the amount of space that the plates, chargers, goblets, and flatware will take up.
4. Plan your sections! You will want to measure the interior width of your refrigerator to make sure you know how large your sections can be. For instance, I used four 6″ cakes but I was able to combine three of those 6-in cakes into one section. The the larger your sections are, the easier it is to make it one seamless, long cake.
5. Make your own cake boards! I purchased Wilton cake boards from Walmart and used Wilton’s gold foil to wrap it. I recommend layering at least two cake boards on top of one another in order to get a stronger base so that your buttercream doesn’t crack. If you have a long cake and a flimsy base, the movement from transferring the cake back and forth will cause the buttercream to crack.
6. Make sure they match! When frosting the different sections, make sure to use your first frosted section of cake as a guide for the other sections. I brought out my first section from the refrigerator when I was frosting my second section just to make sure they matched in height and width.
Find more from Betheny on Instagram, @bethenycakes.


Add comment